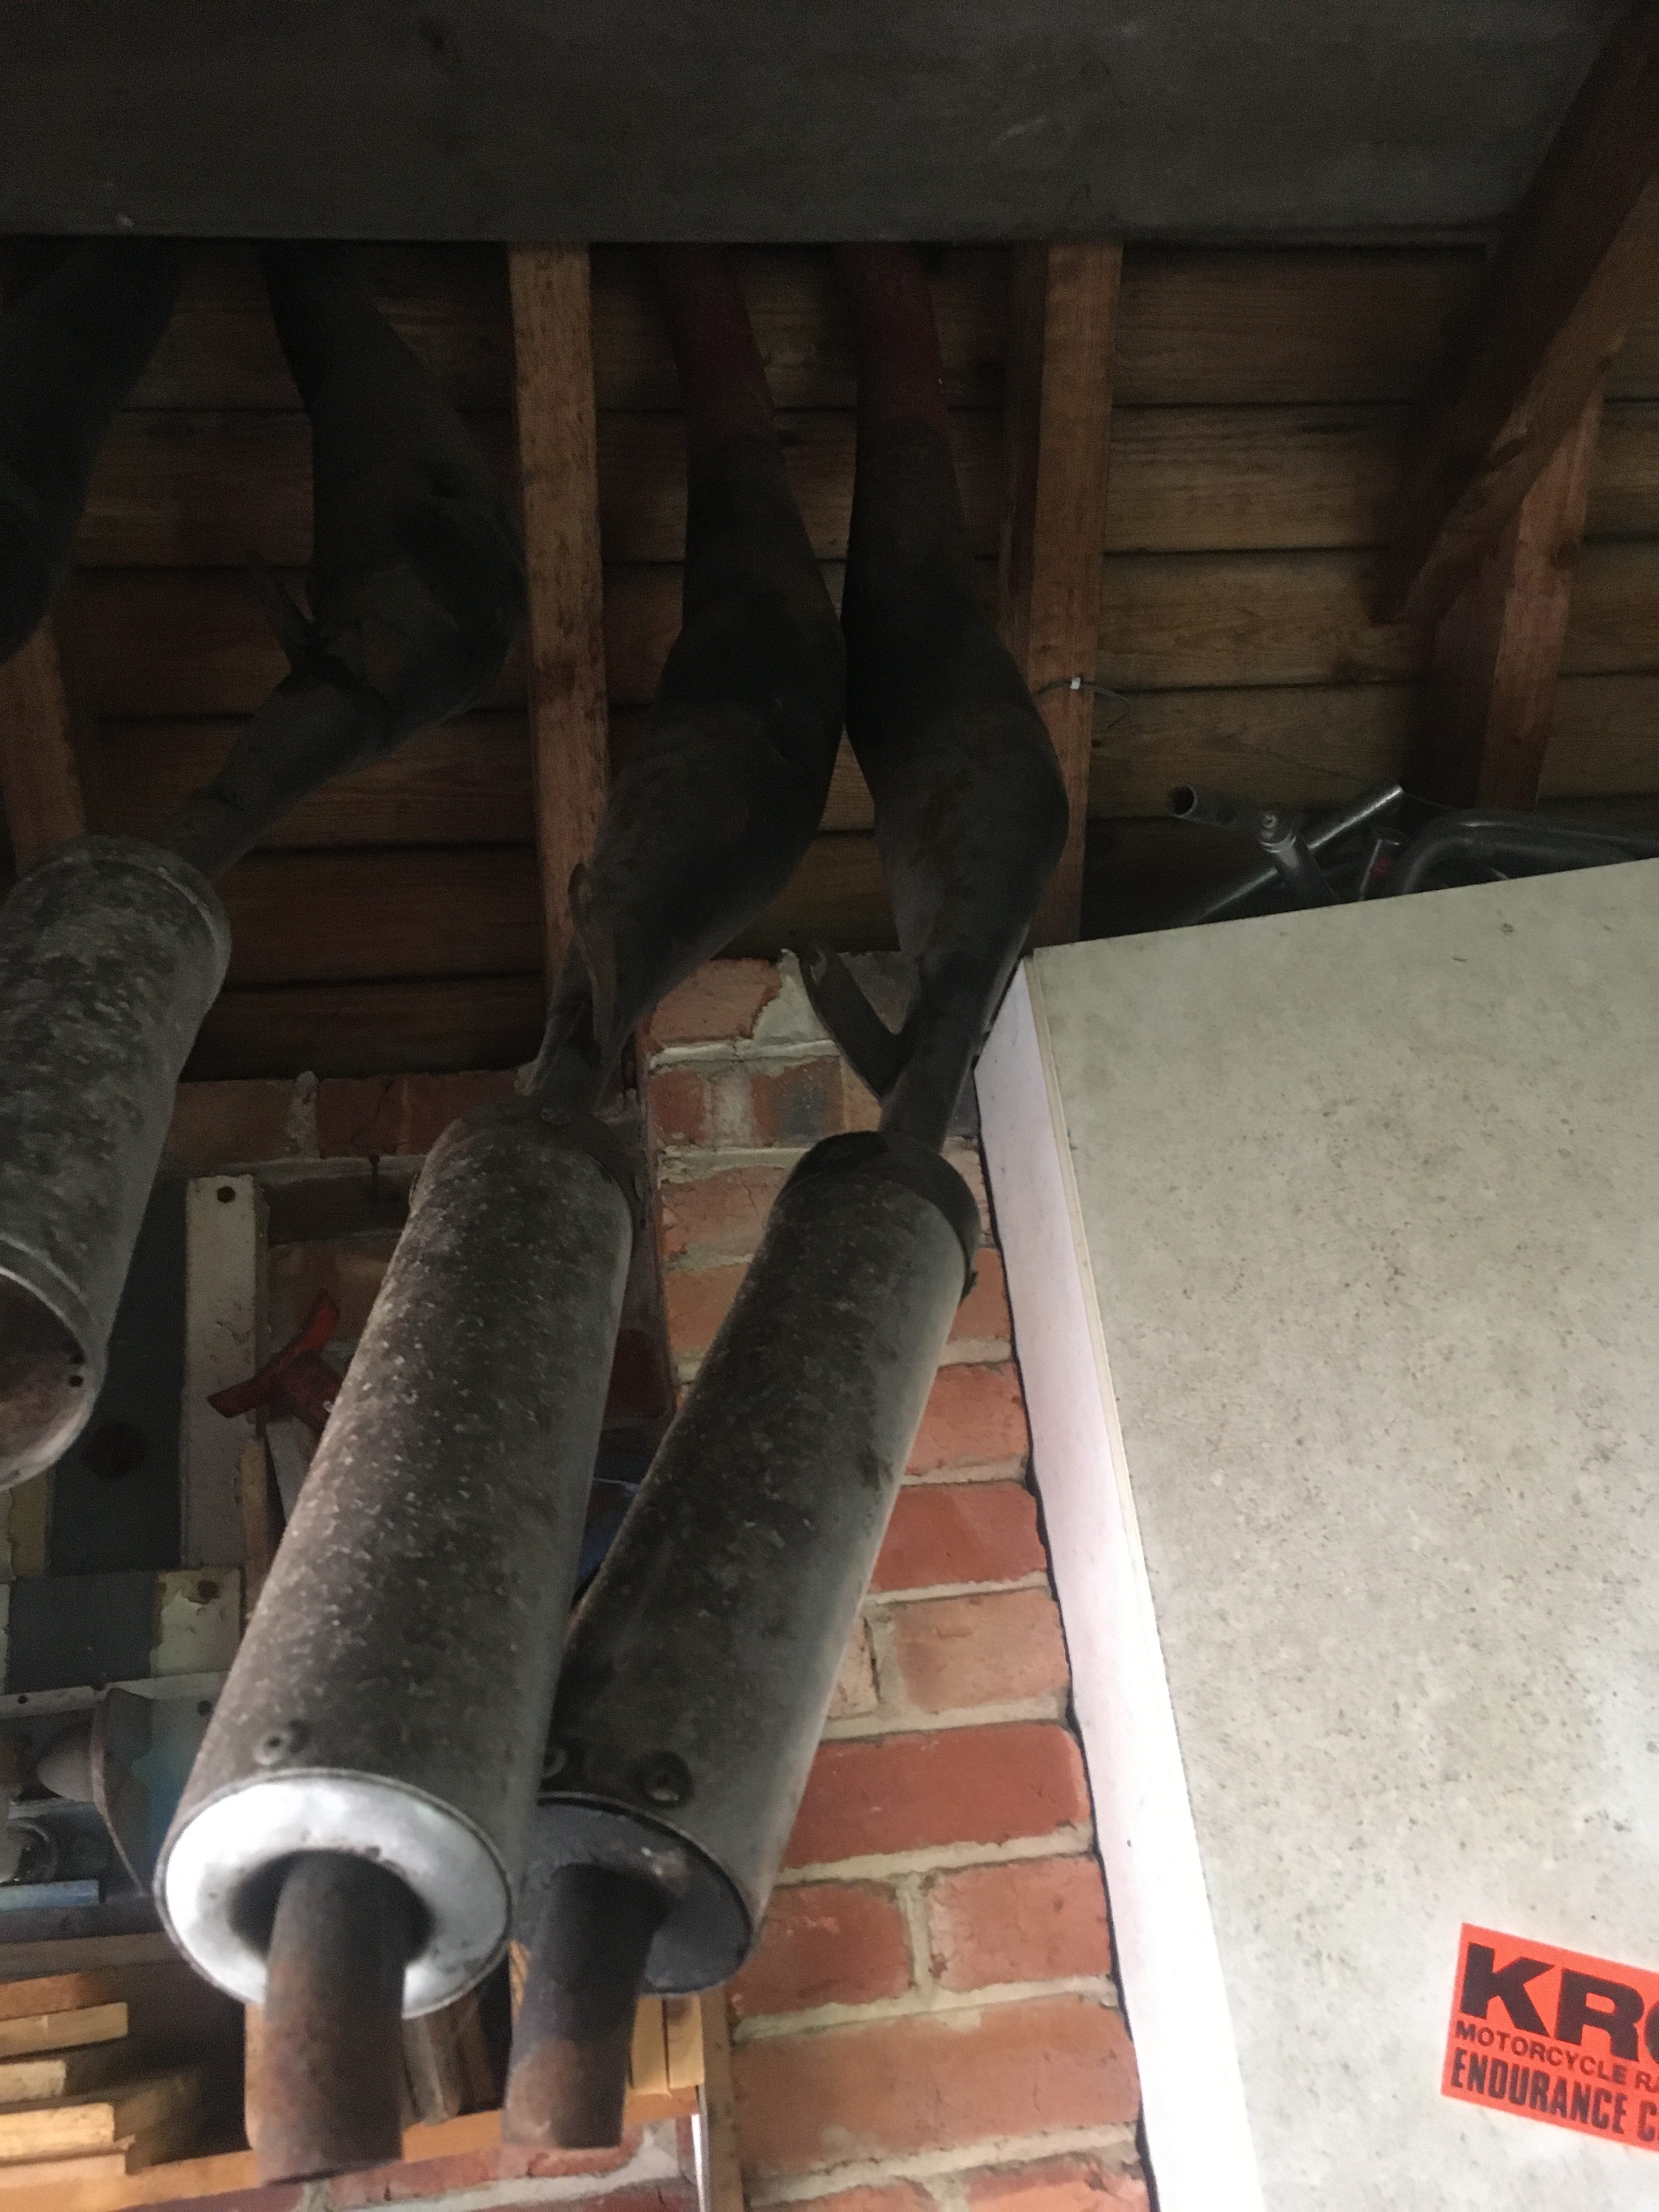
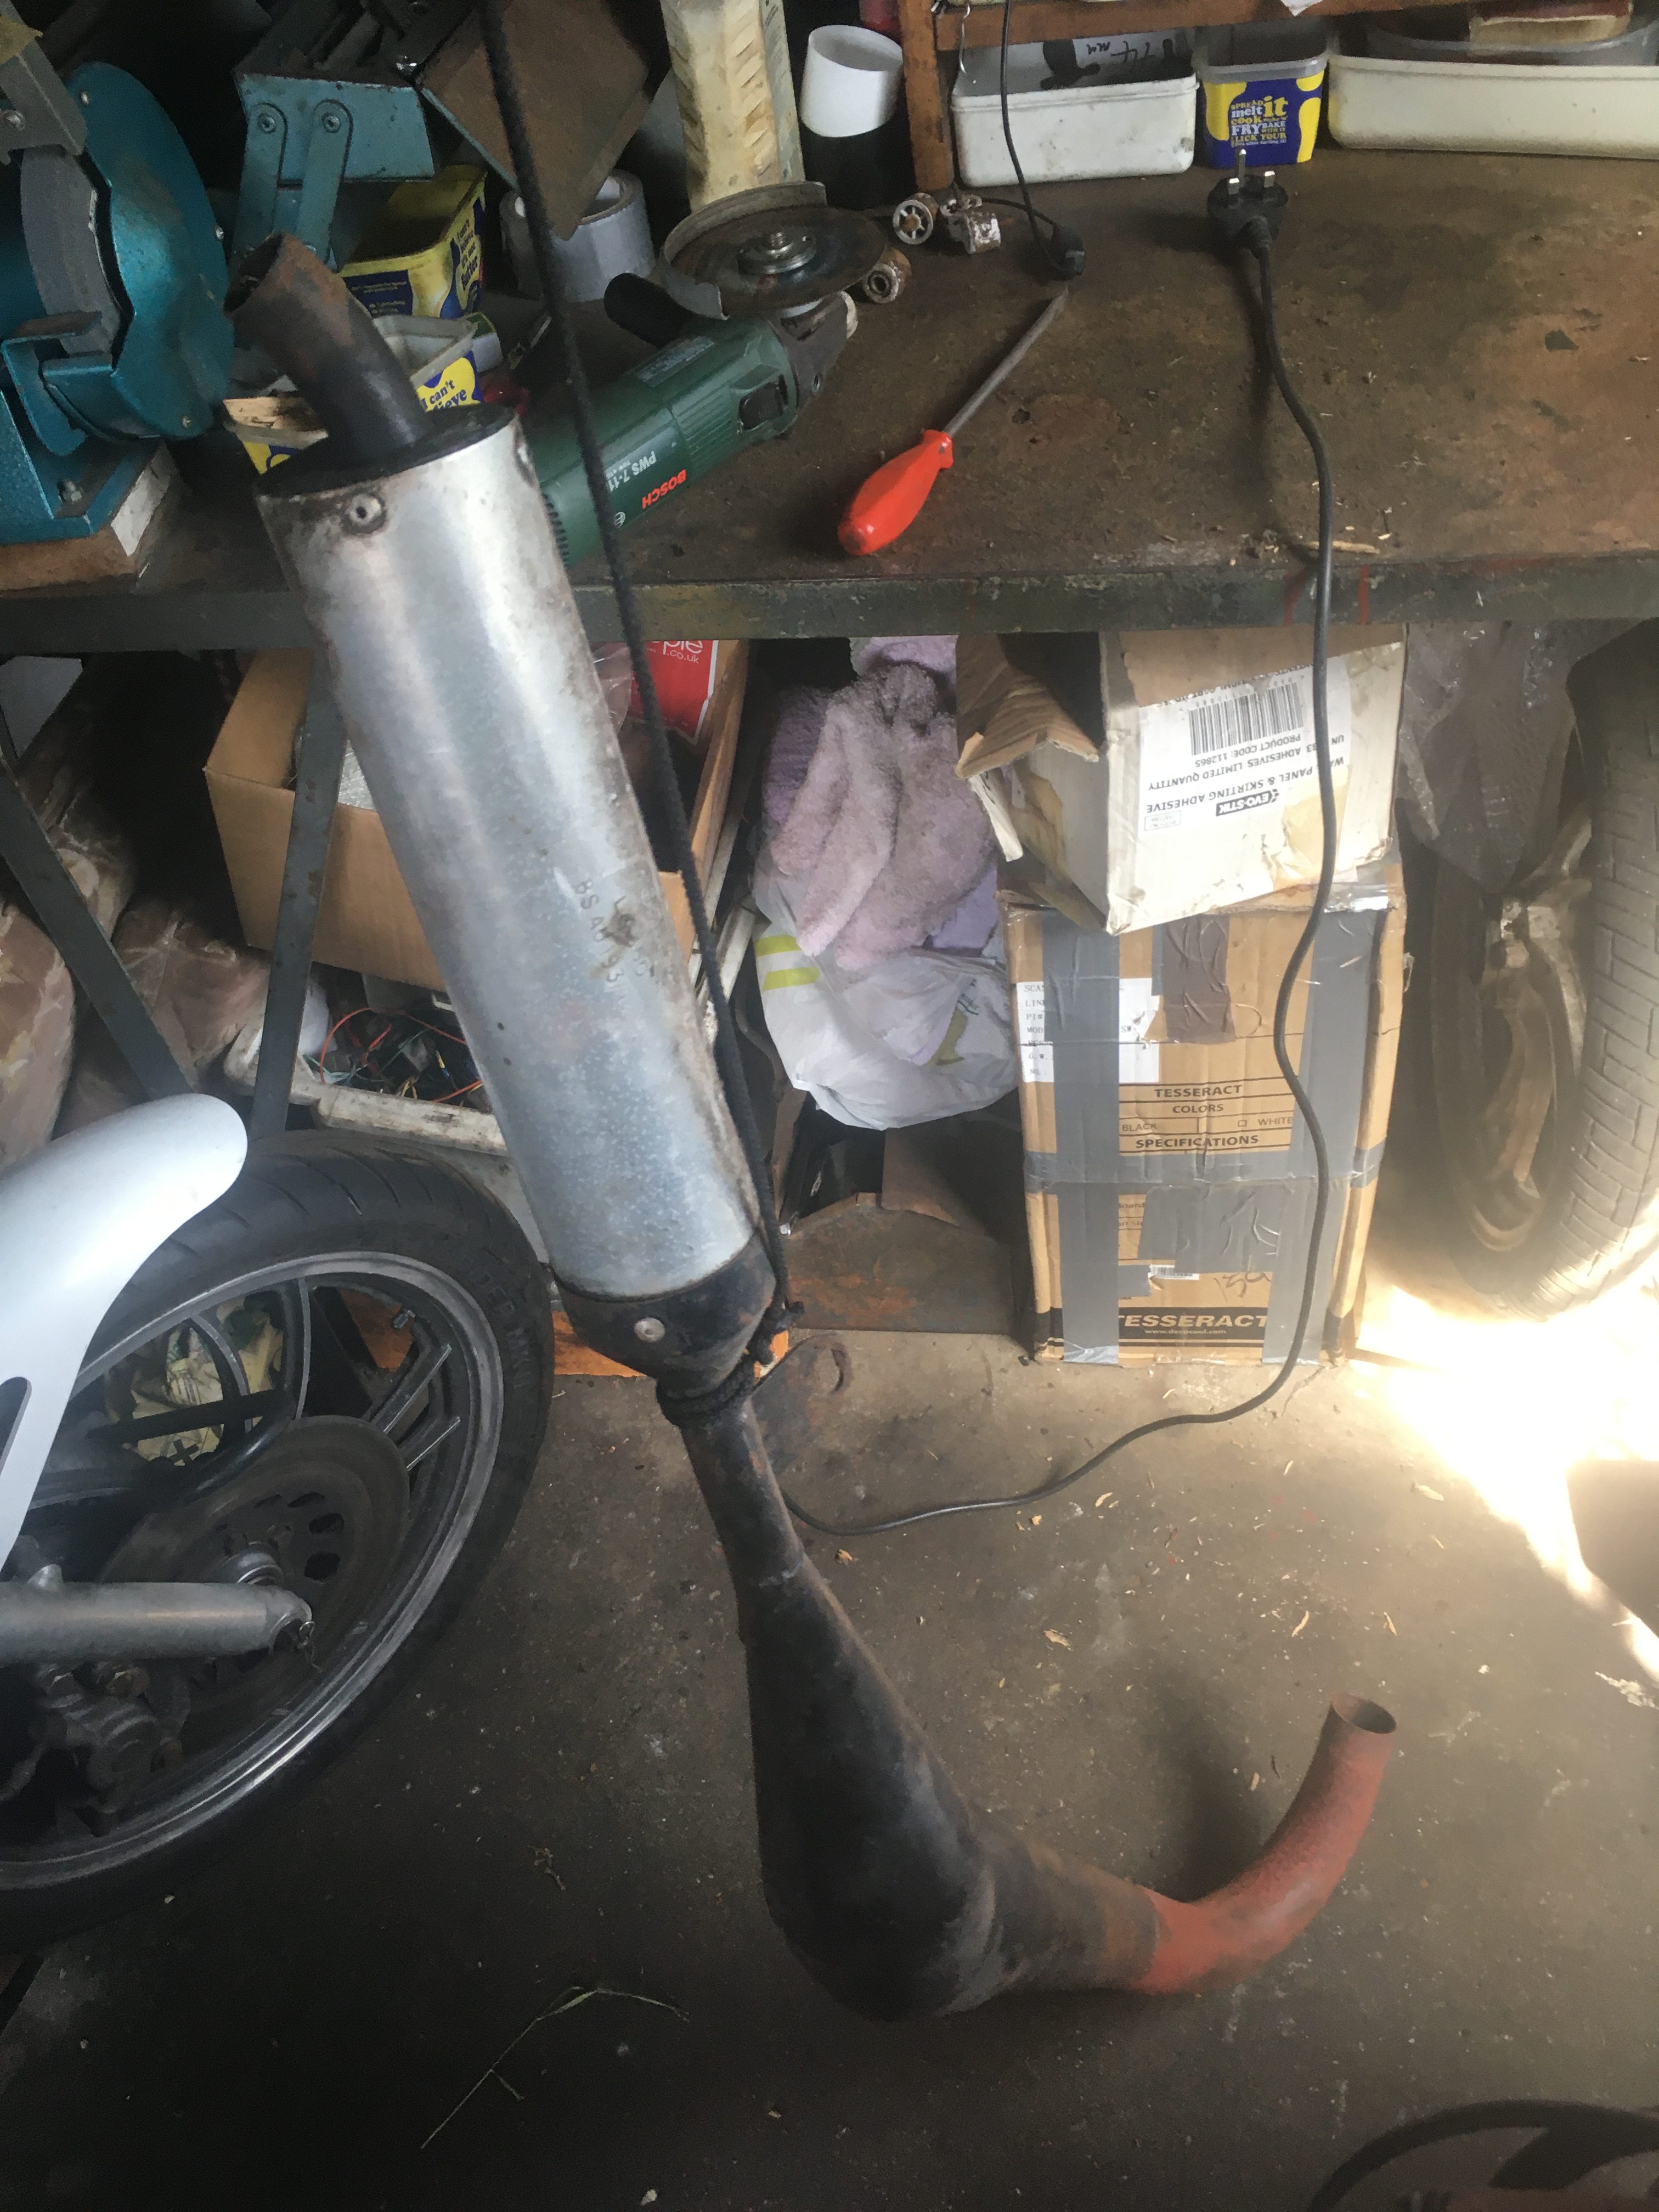
Hanging in the garage for over 20 years are a pair of JL, (Jim Lomas), expansion chambers for the RD350LC.
Even way back when I acquired them, I knew that the downpipes were rusty, and not long for this world.
Evidence shows that I did fit them to a bike at one point, but I have no recollection of doing so.
20 years ago, I painted over the downpipes with a layer of rust eating Bonda-Primer paint, and hung them on the wall, where they have remained until today.
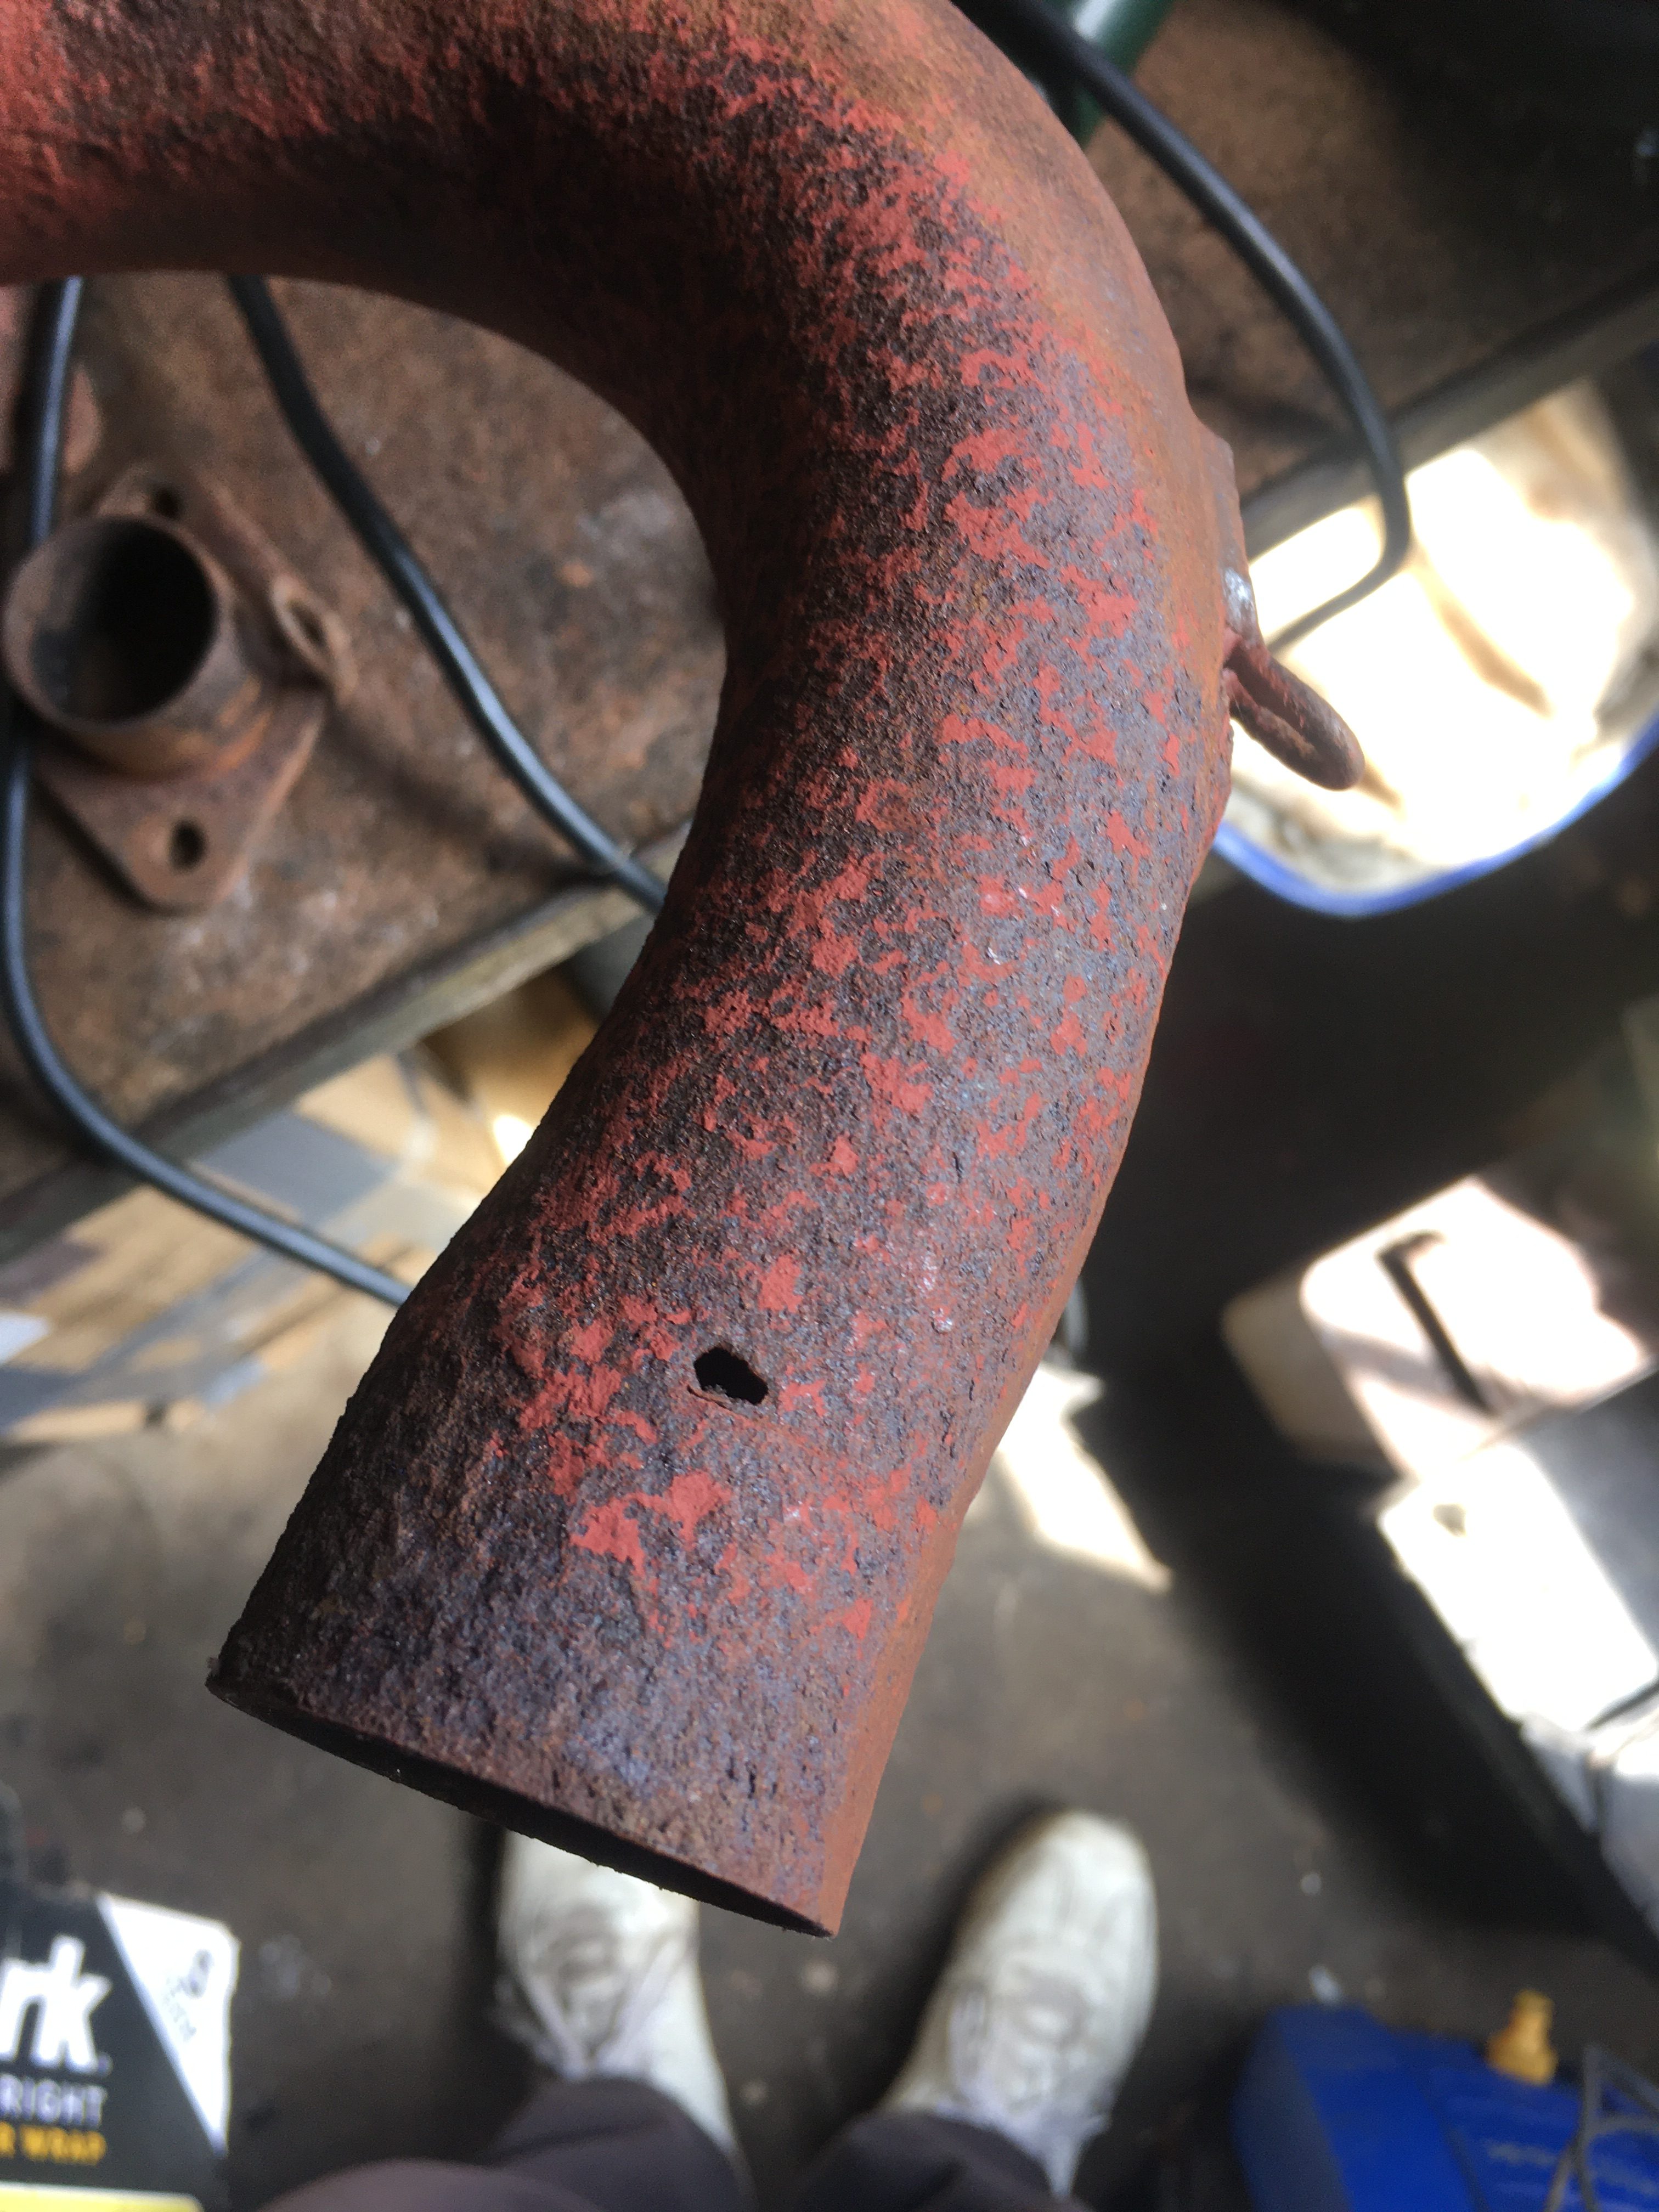
After getting them down from their perch, a quick assay showed that one downpipe had been crudely welded up in the past, (Not me Guv. I didn’t own a welder until a couple of years ago), and that both had areas where the metal is paper thin.
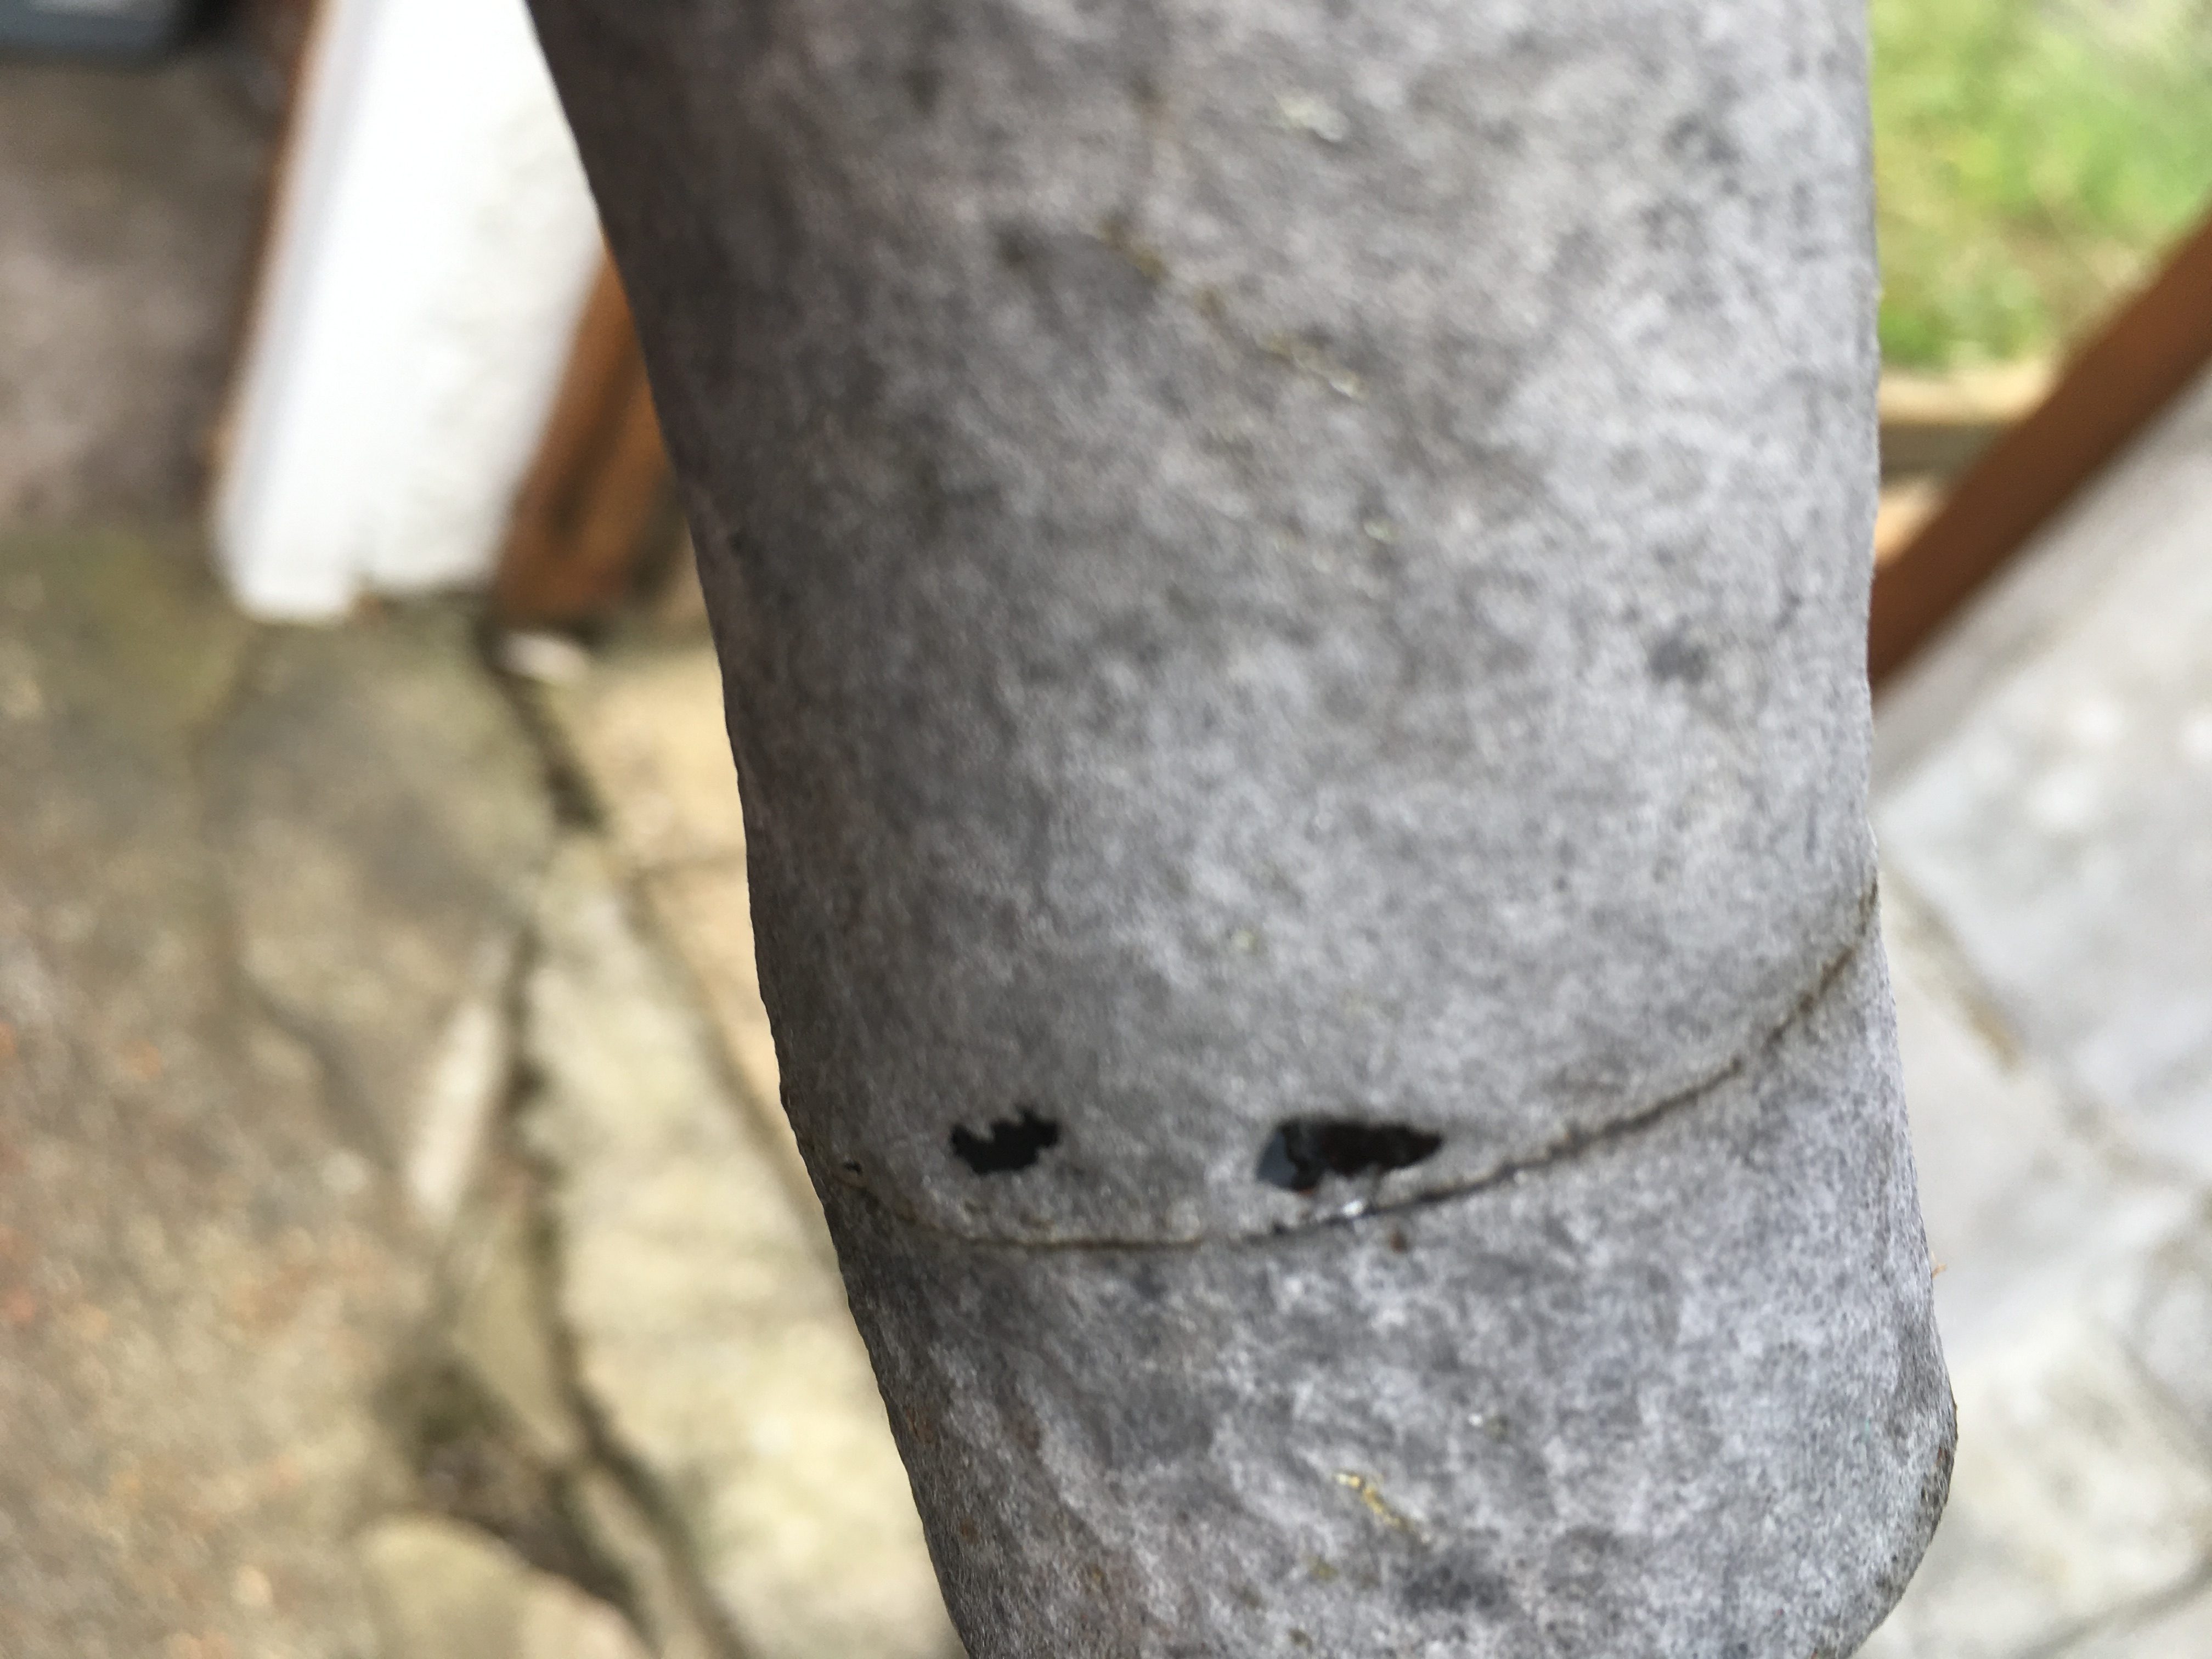
The primer paint had done it’s best, but time takes it’s toll and much of it had flaked off.
Having a little scrape with a screwdriver resulted in the tool piercing the metal and leaving a neat little hole.
Clearly these are not usable as is.

After toying with the idea of just throwing them away, or paying someone to replace the downpipes, I decided that the first step must be to get a clearer idea of the damage. The rust (and the old paint) must be removed.
I attacked the Right hand pipe with my tool of choice, a drill mounted rotary wire brush, removing as much of the clag as I could.
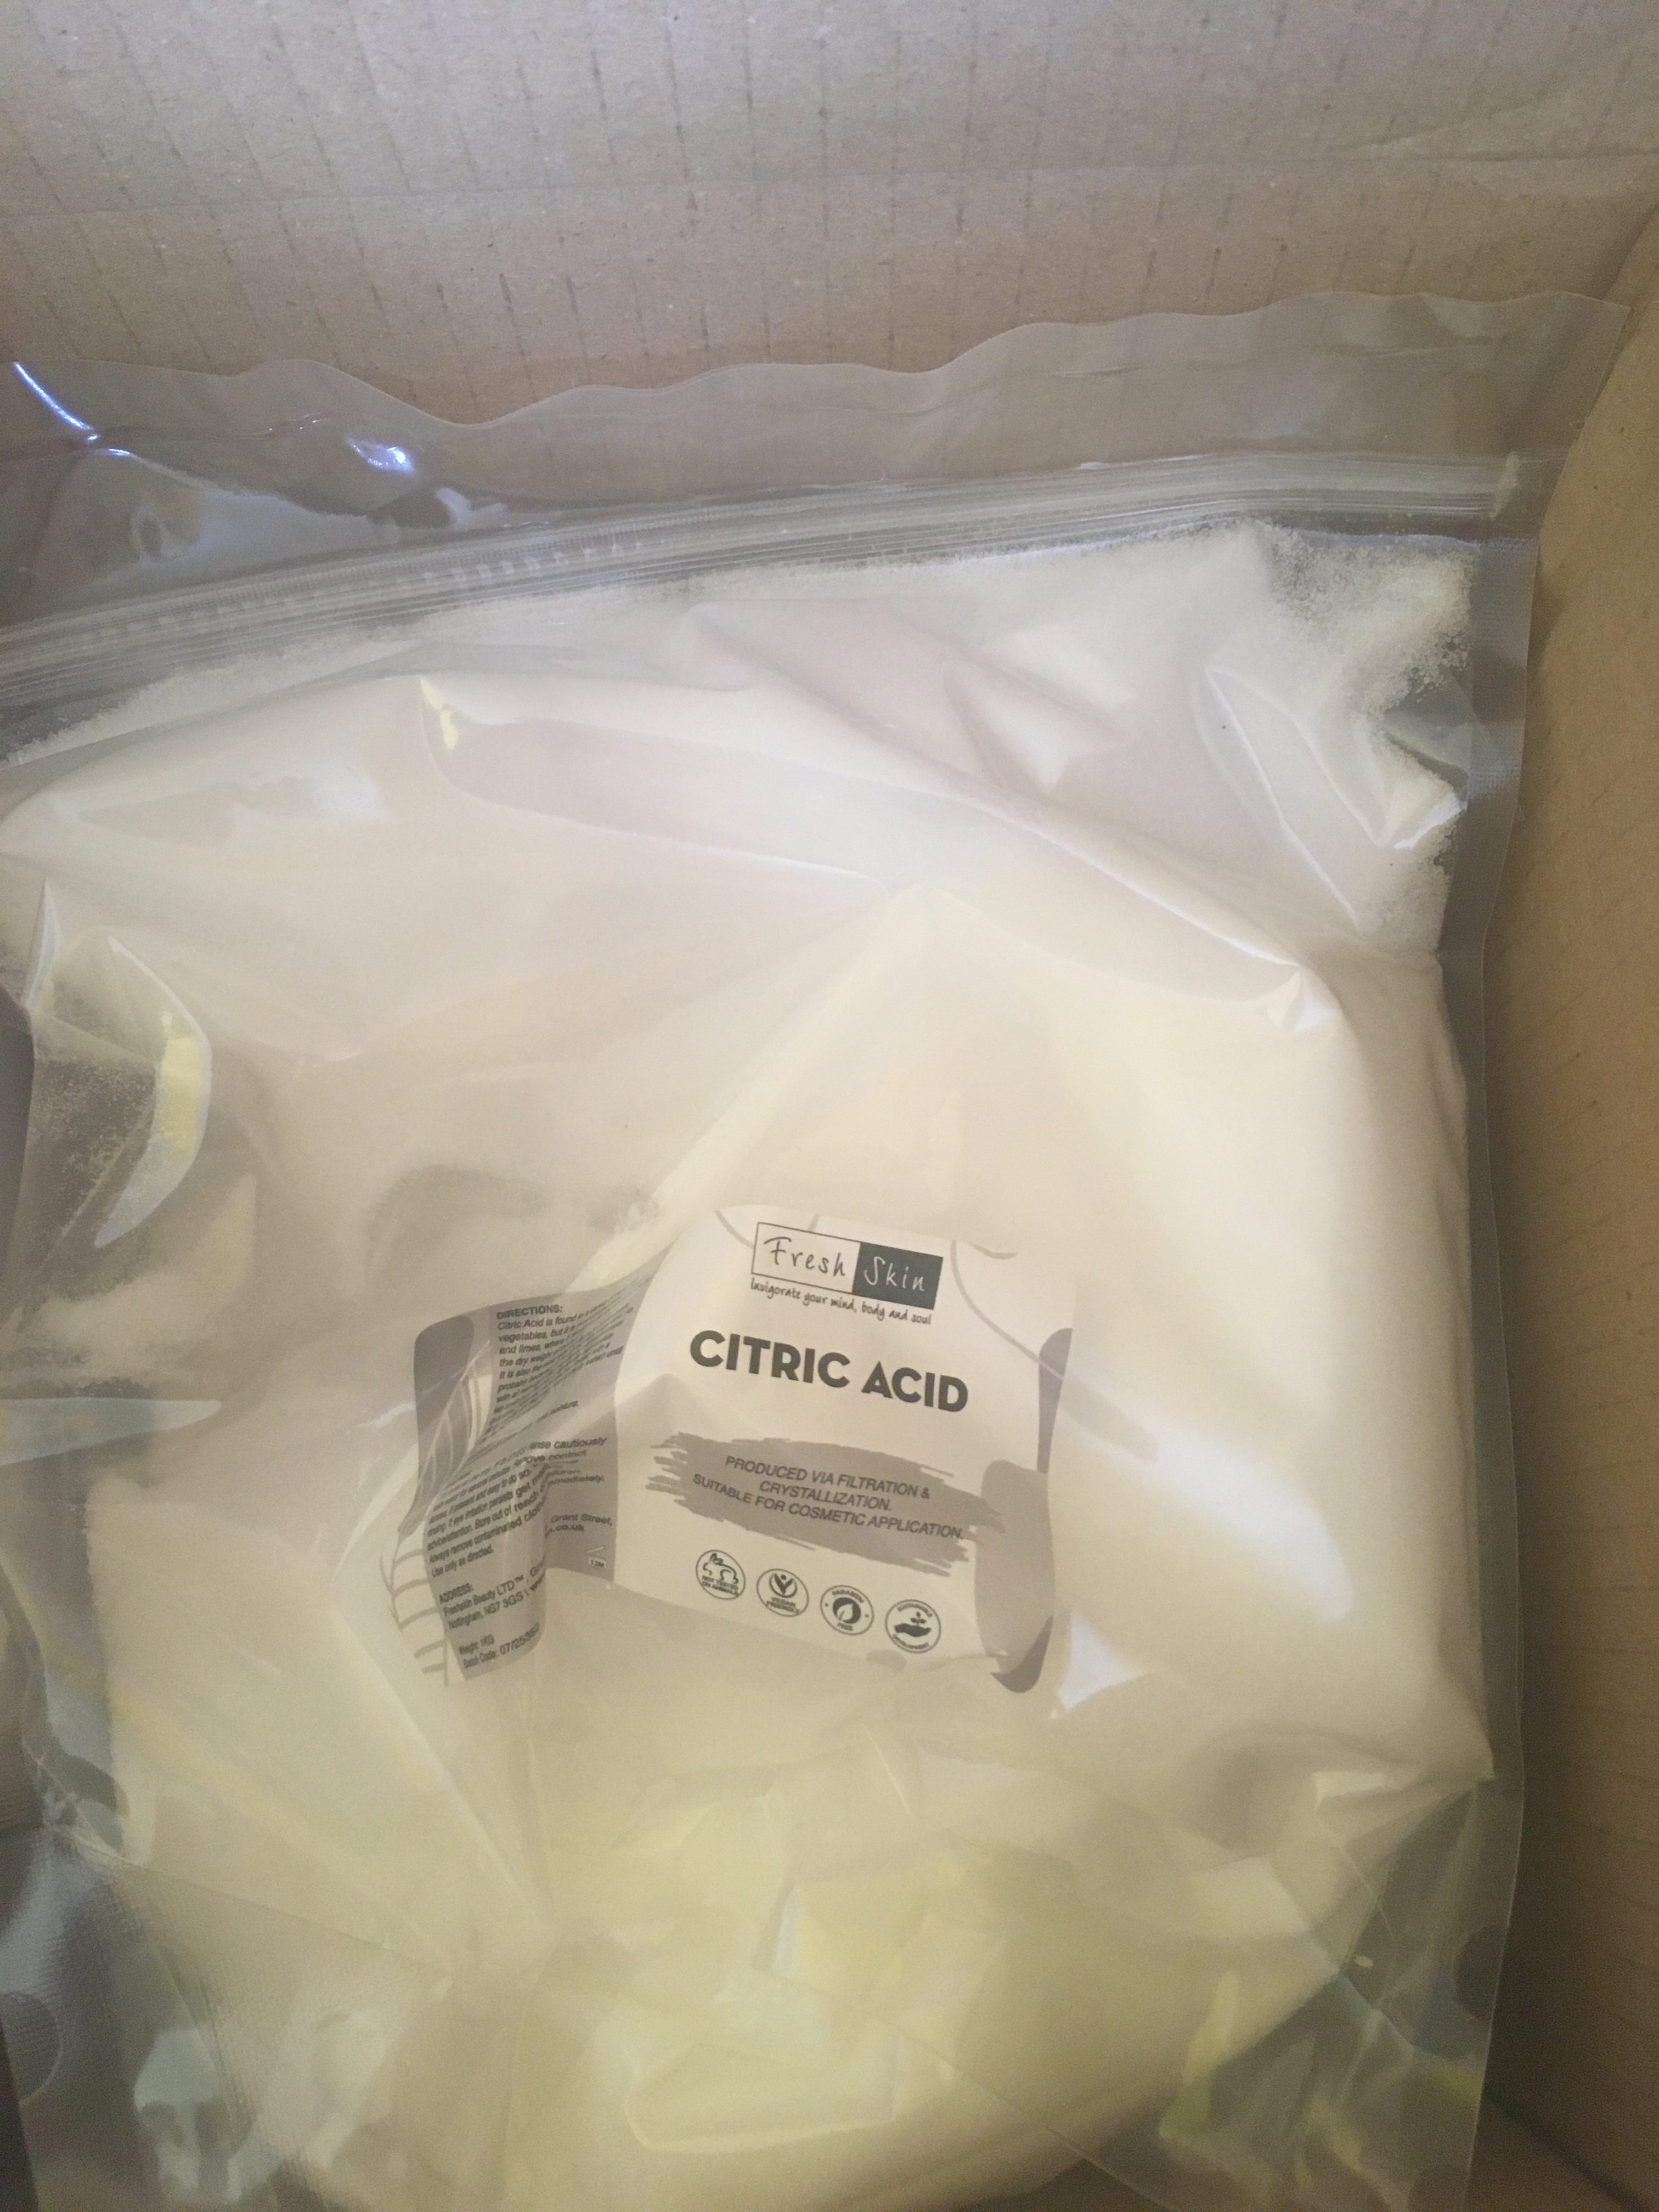
After launching a thread on the RDLCCrazy forum, the advice was to de-rust with Citric Acid.
Citric acid comes in solid crystal form. Further digging in the archives of the forum led me to a recommended mix of 40g per litre of warm water.
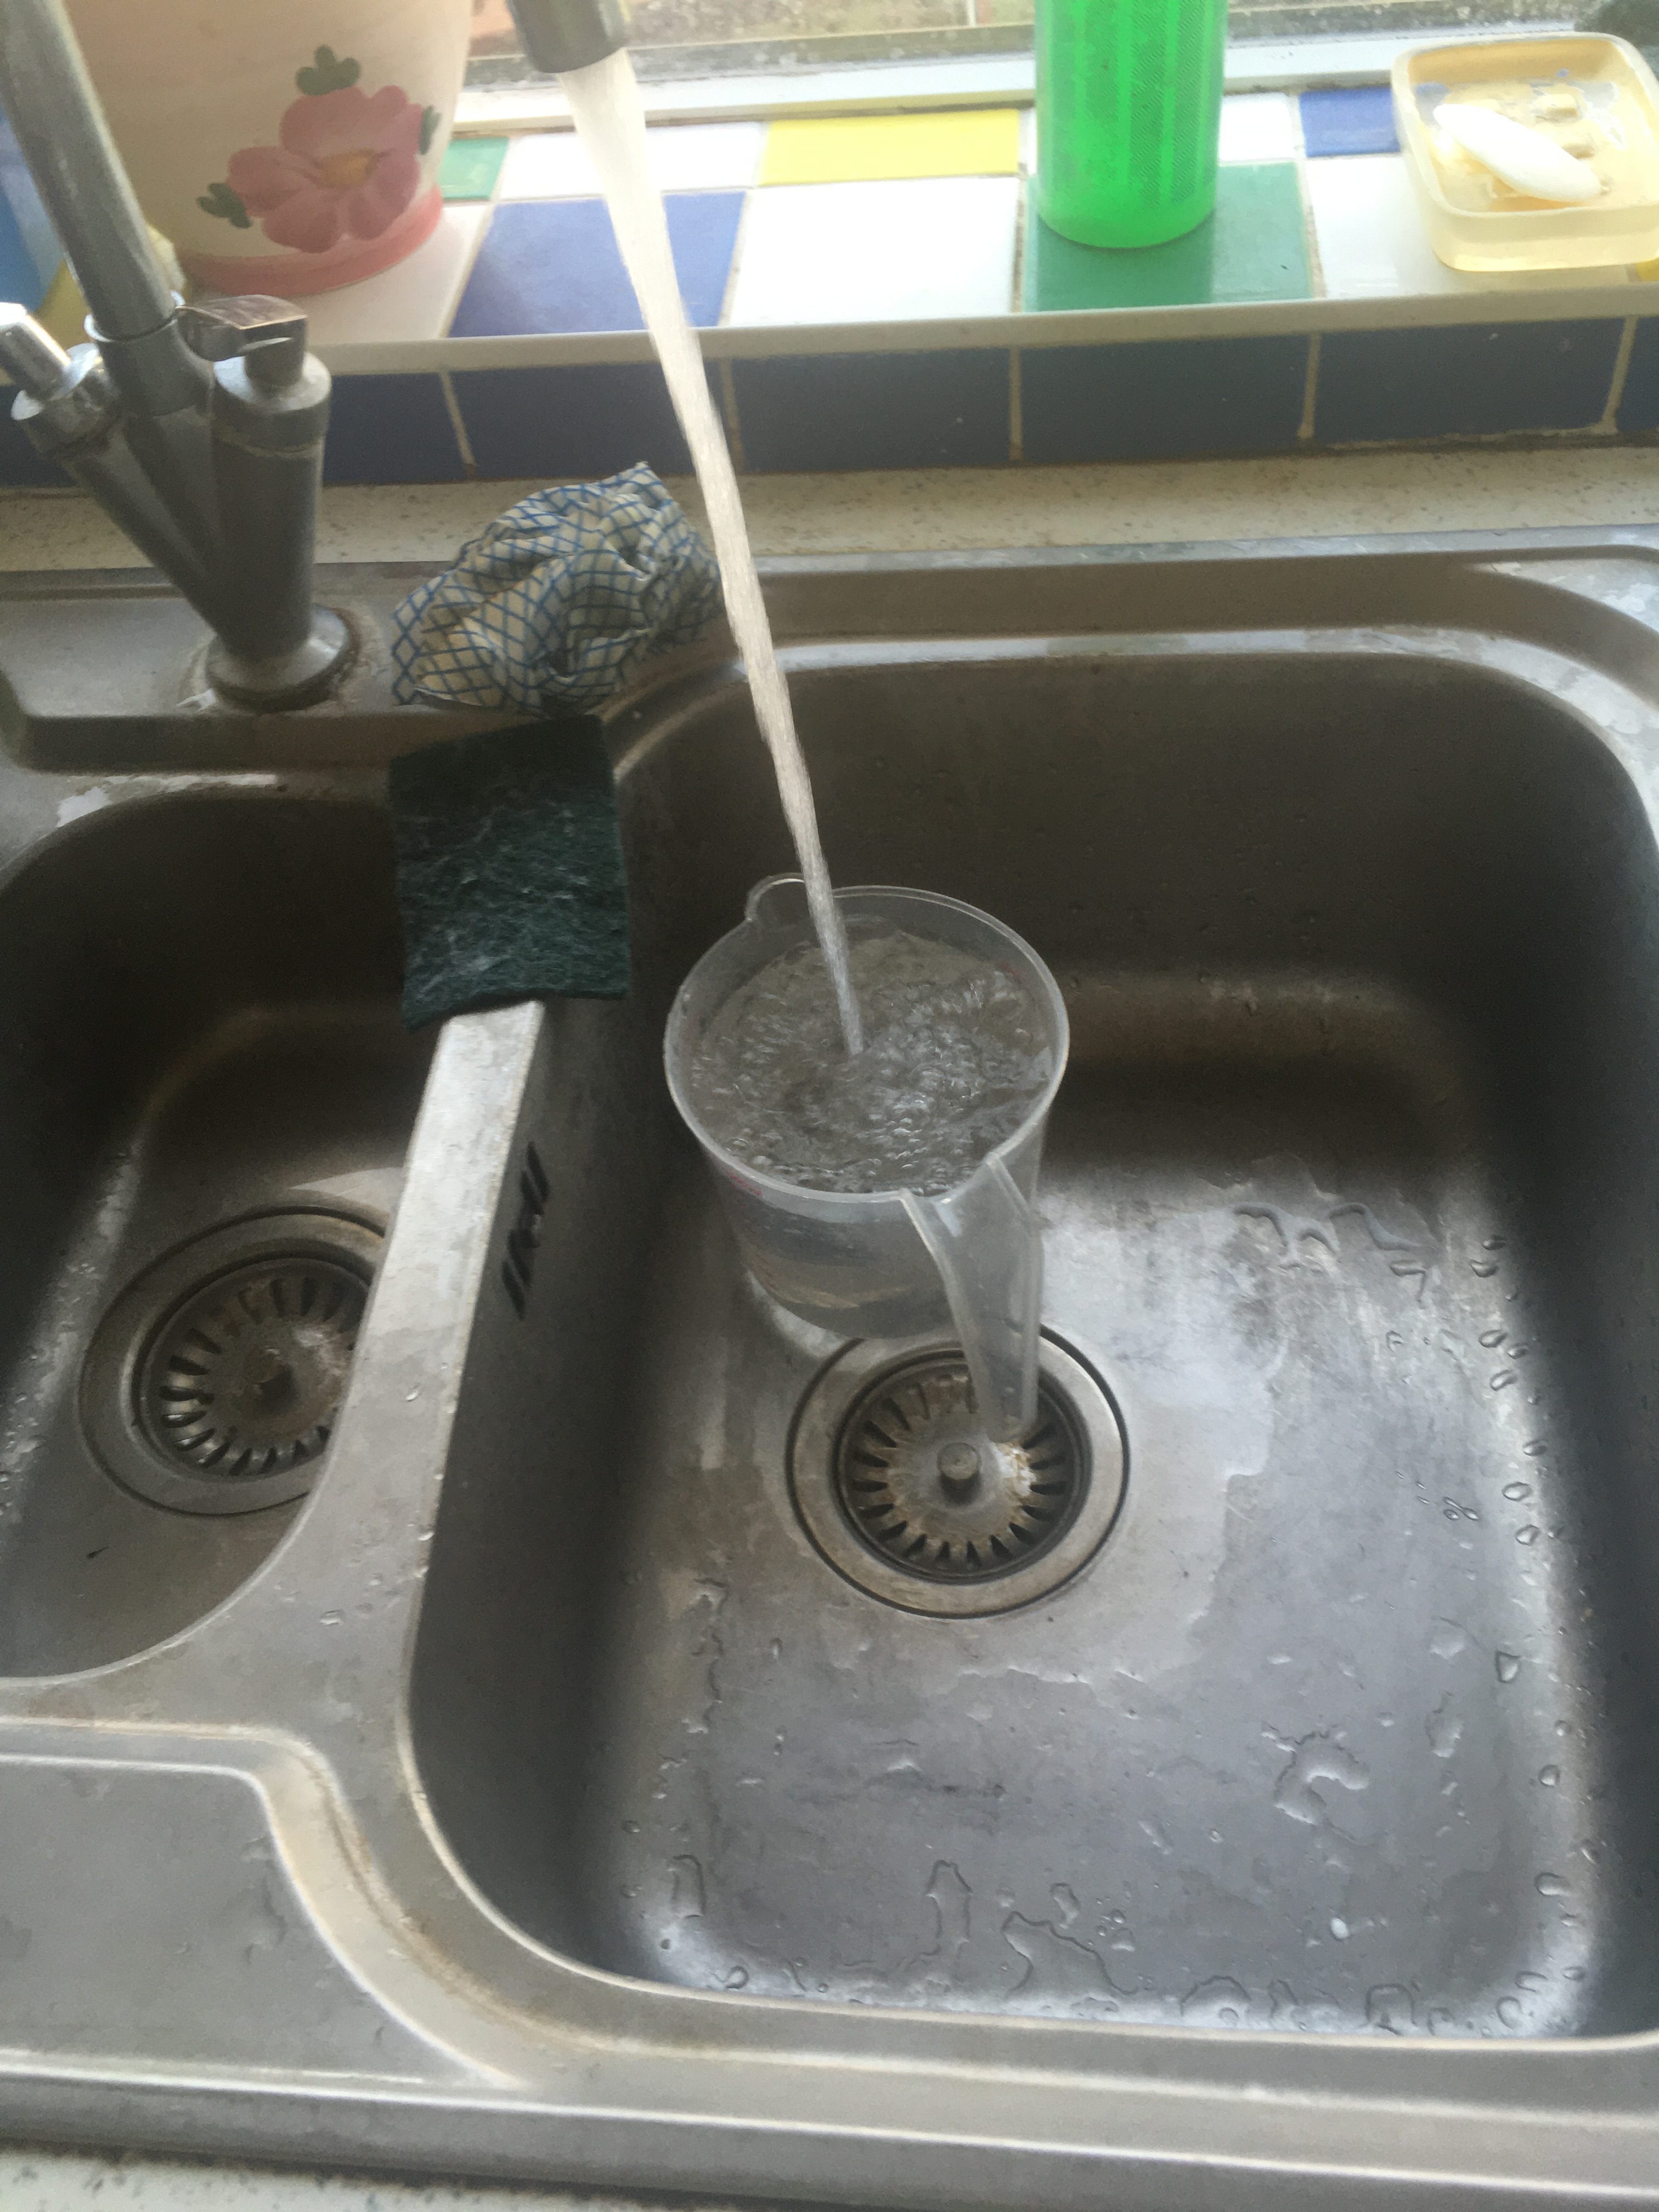
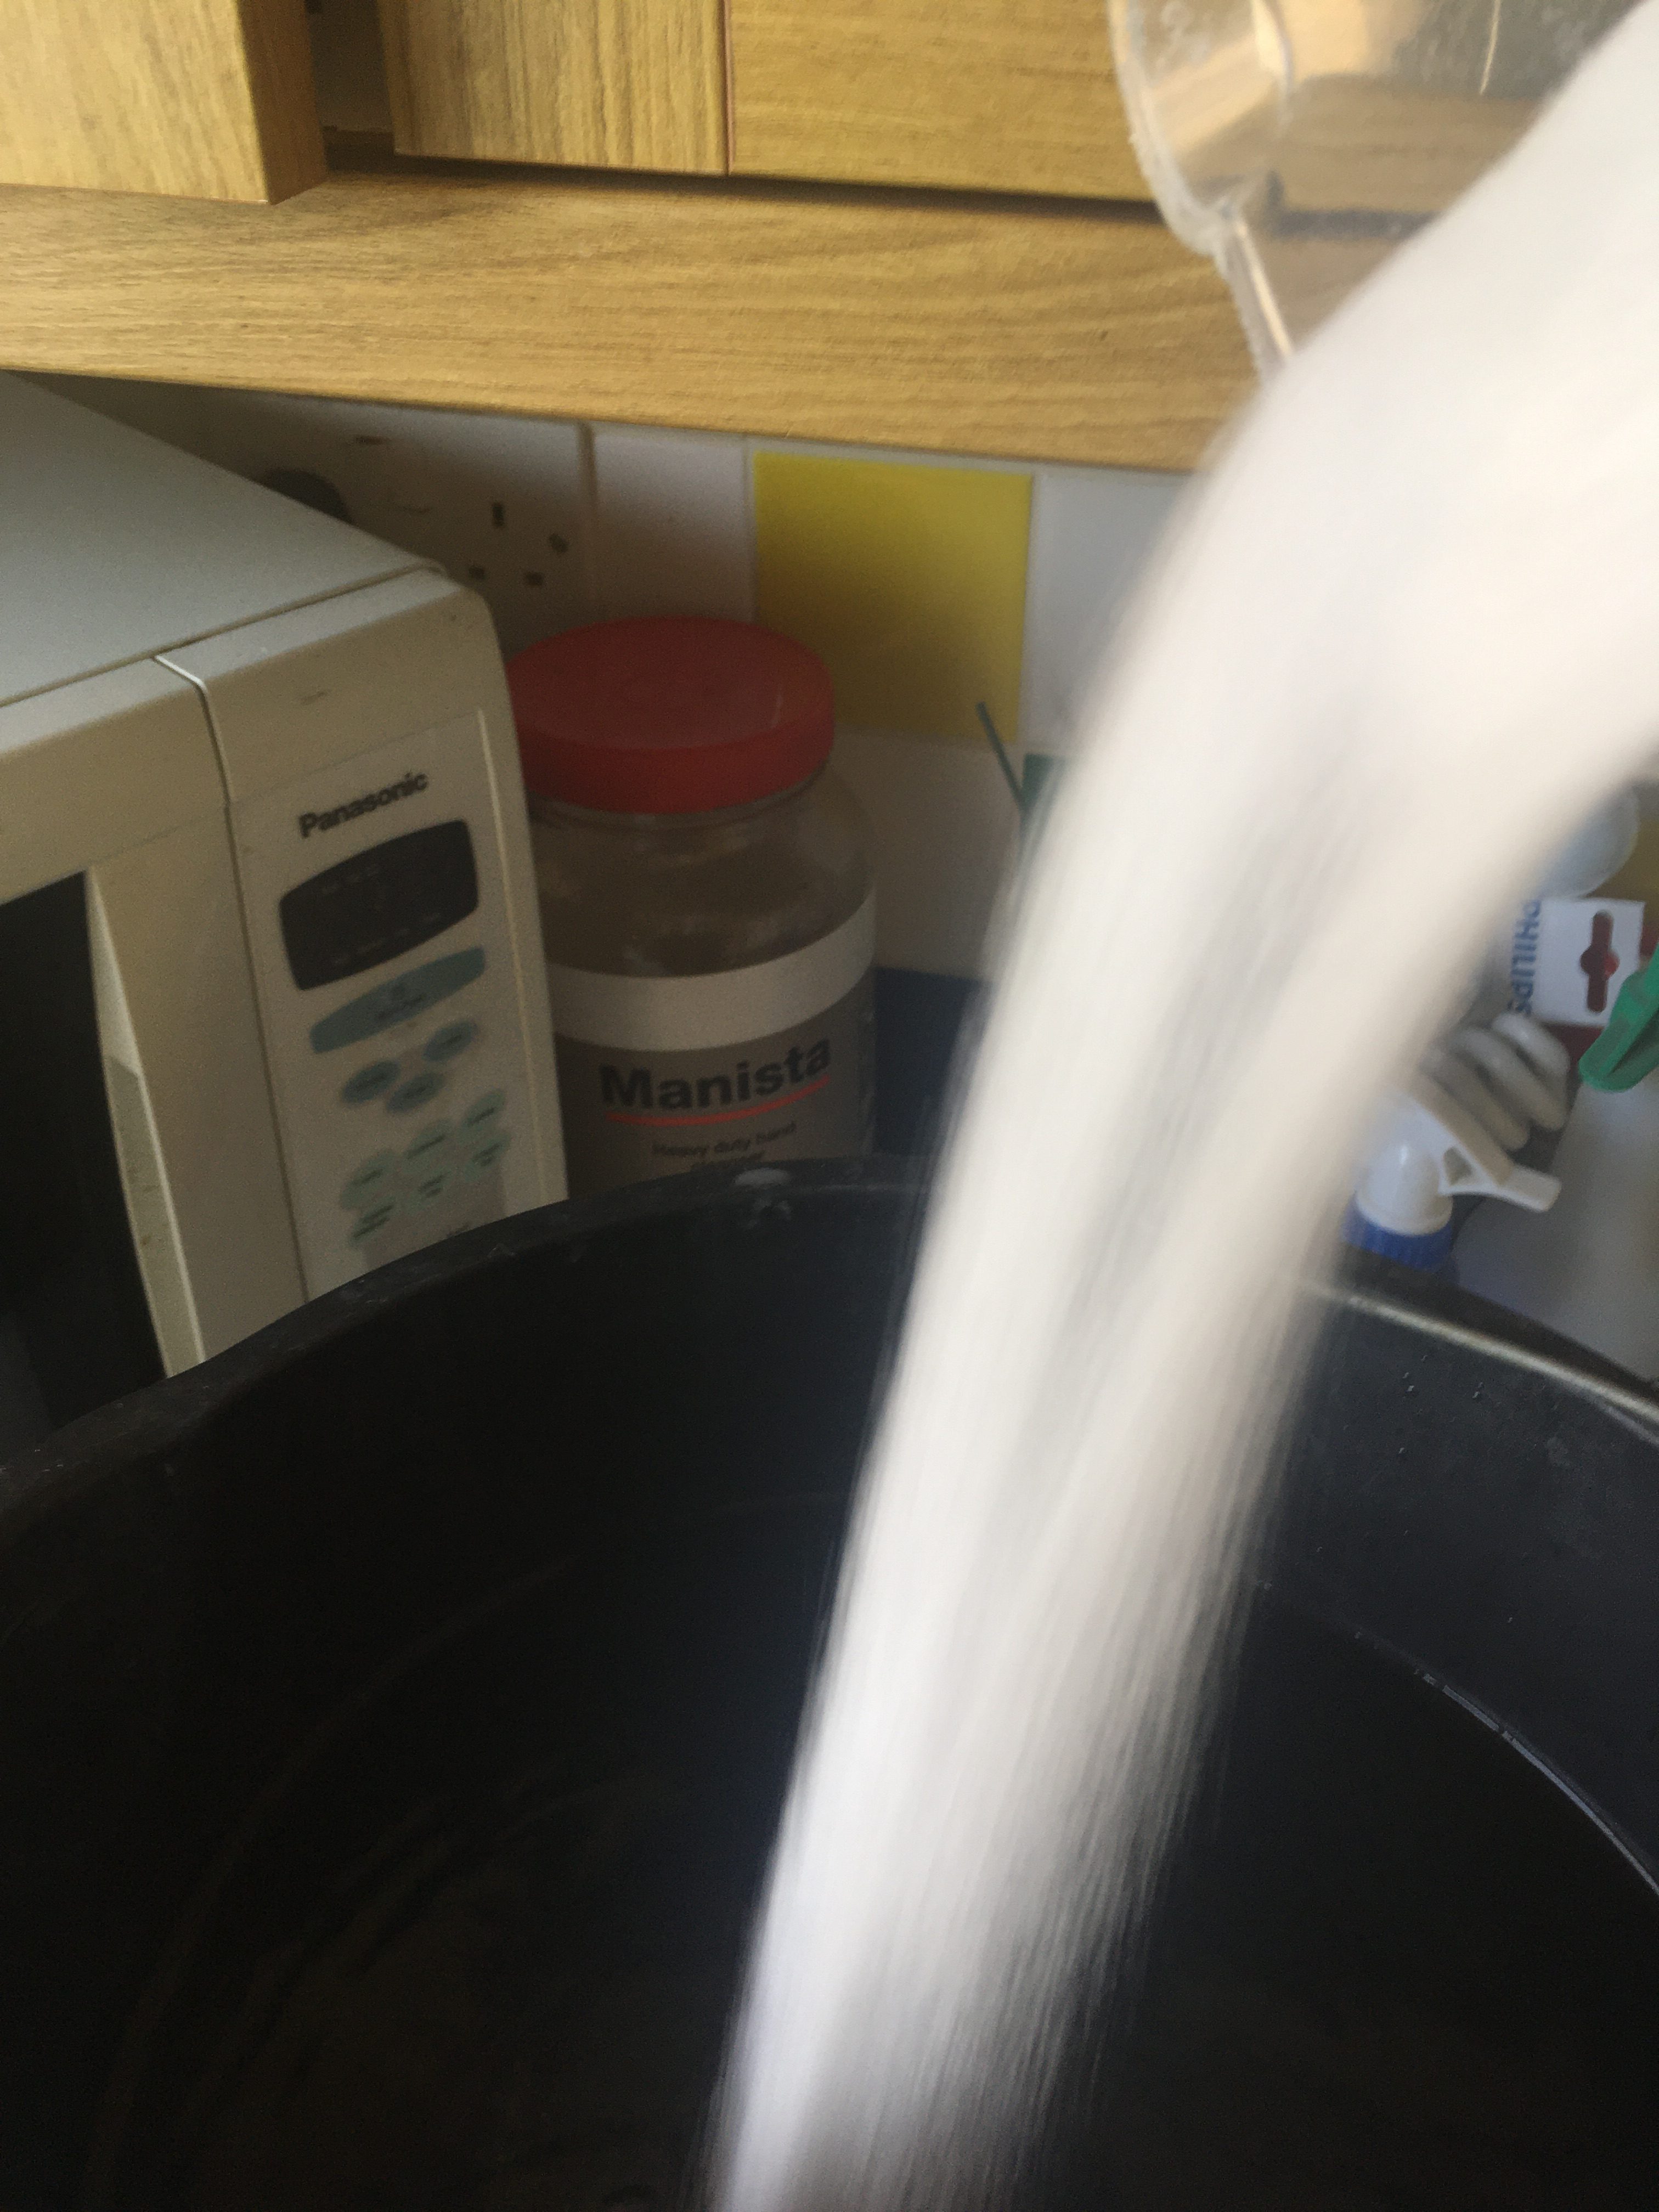
Having made up a bucket of Citric Acid, we now need to figure out a way of suspending the pipe in it.
Fortunately, I have various beams and things suspended from the roof in my garage.
I can suspend the pipe from the roof on a cord, adjusting until it is just above the floor. Then place the bucket of acid underneath.
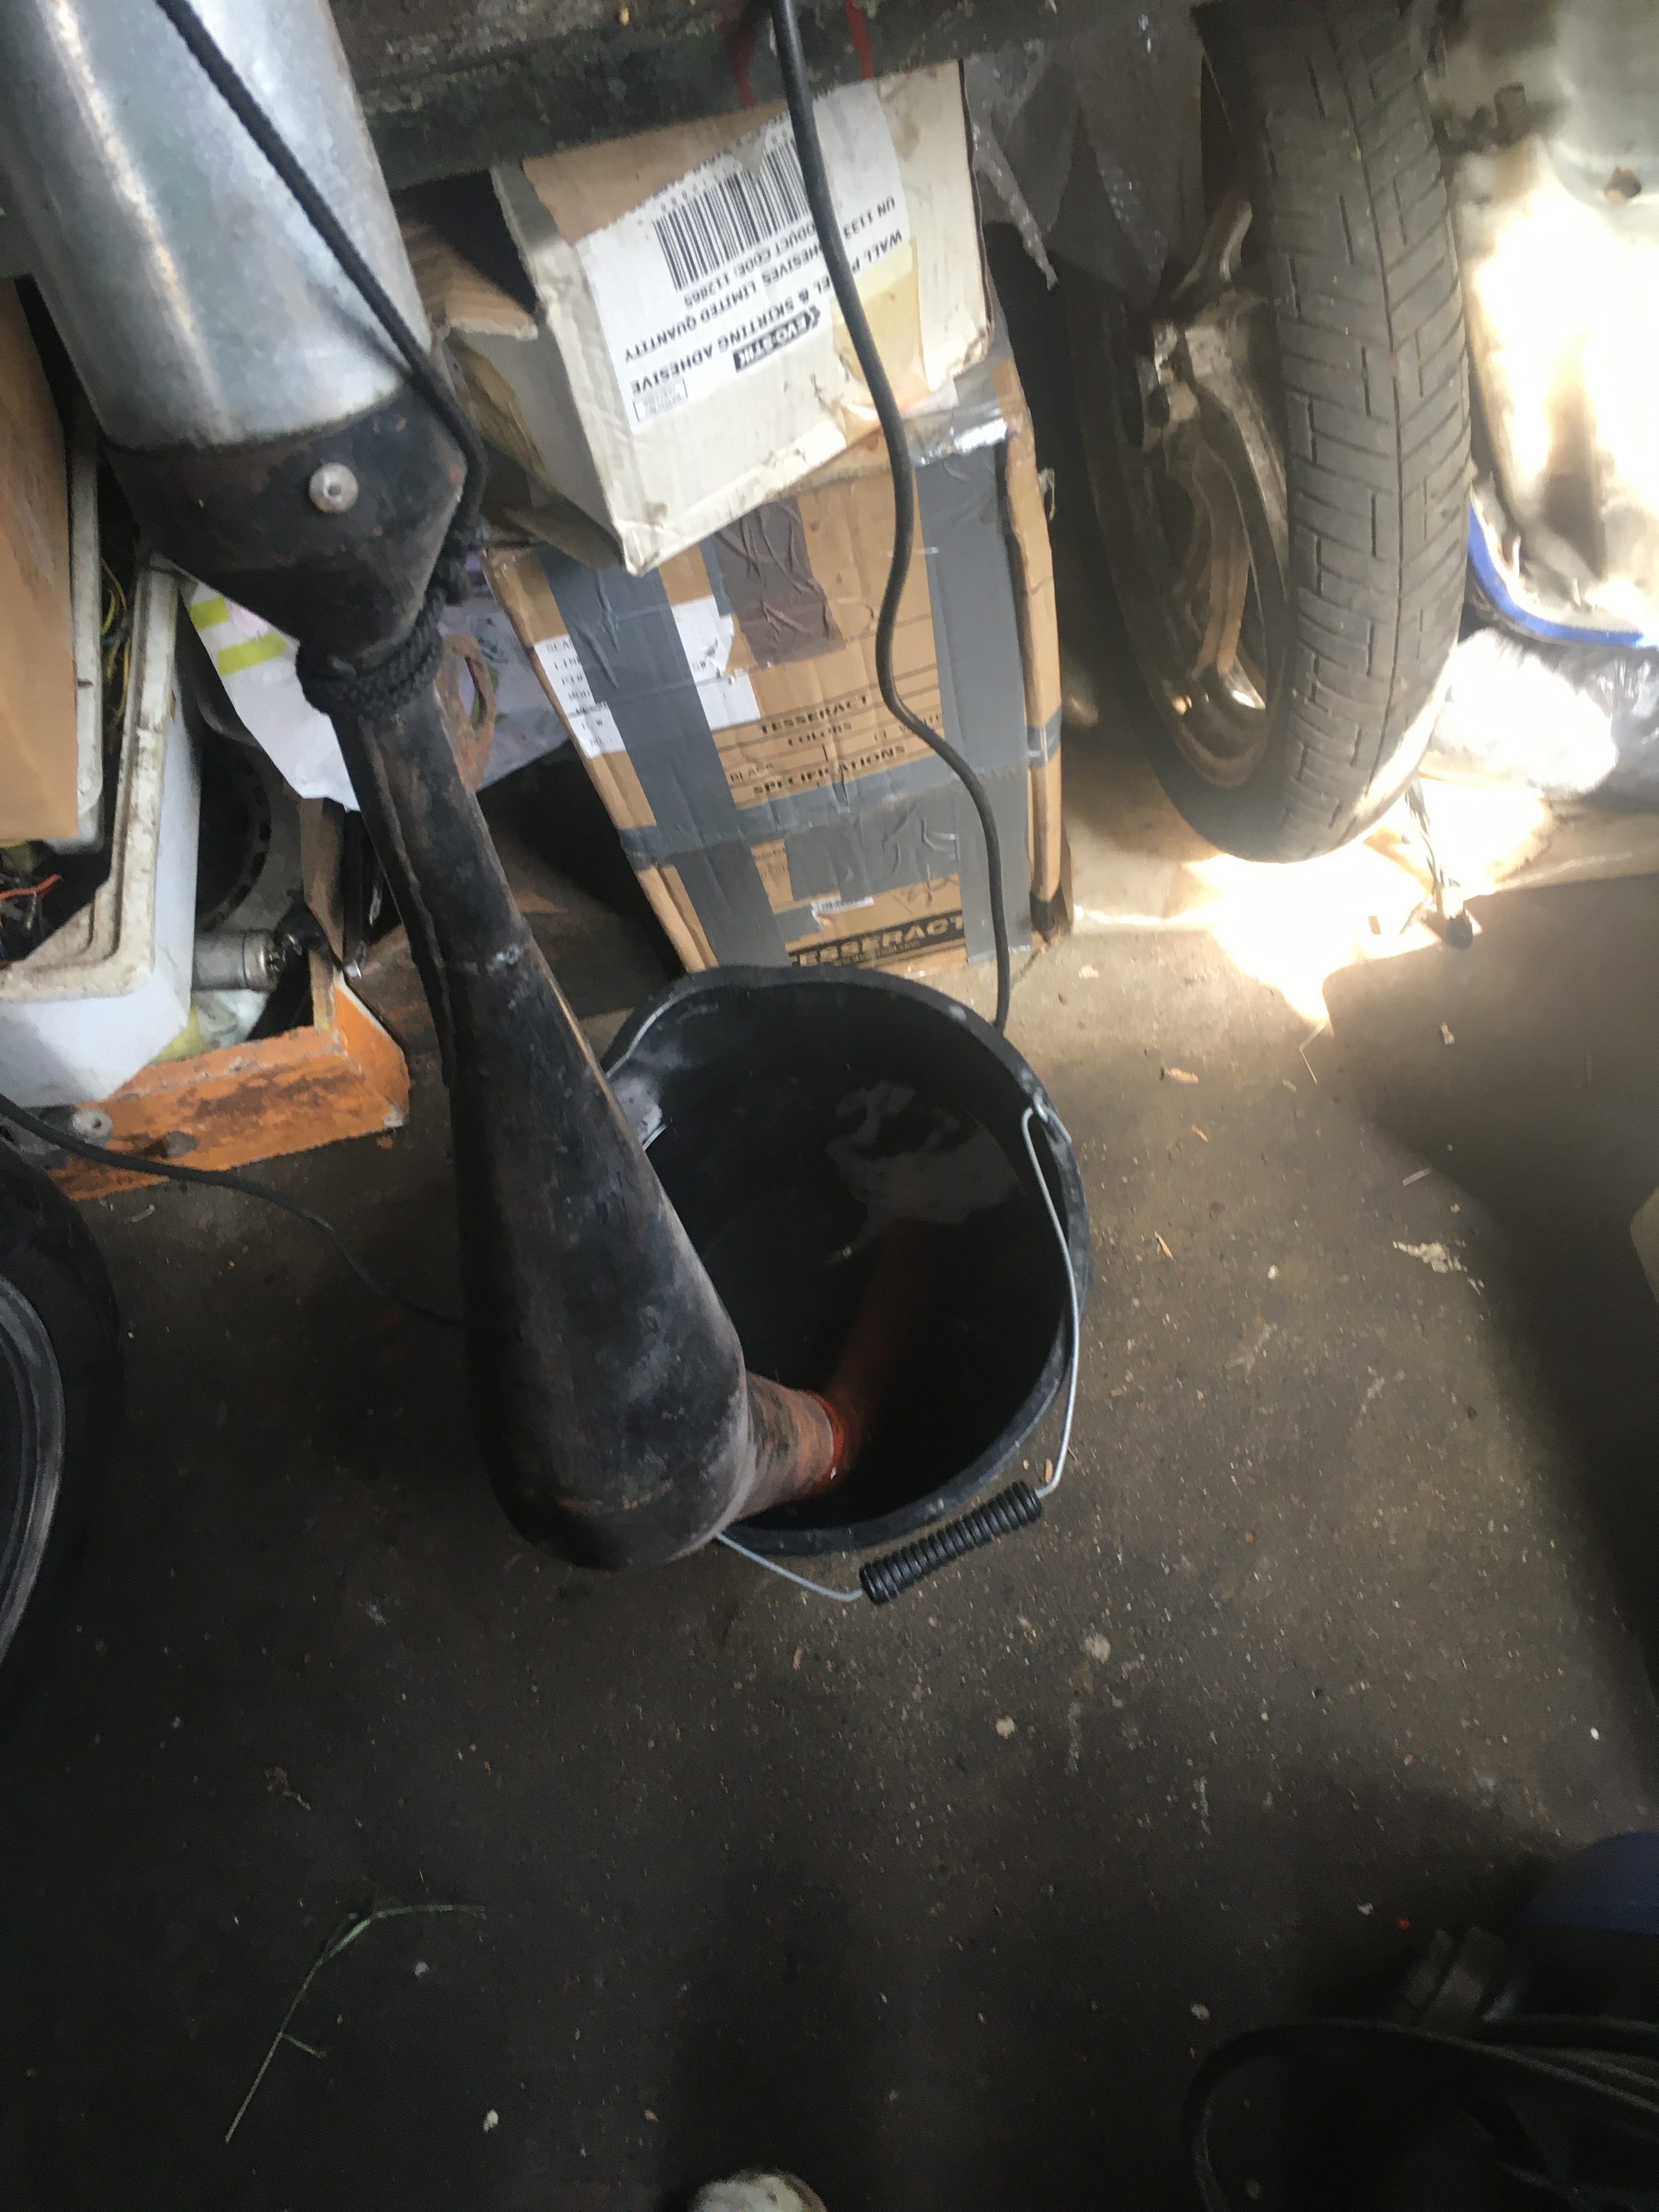
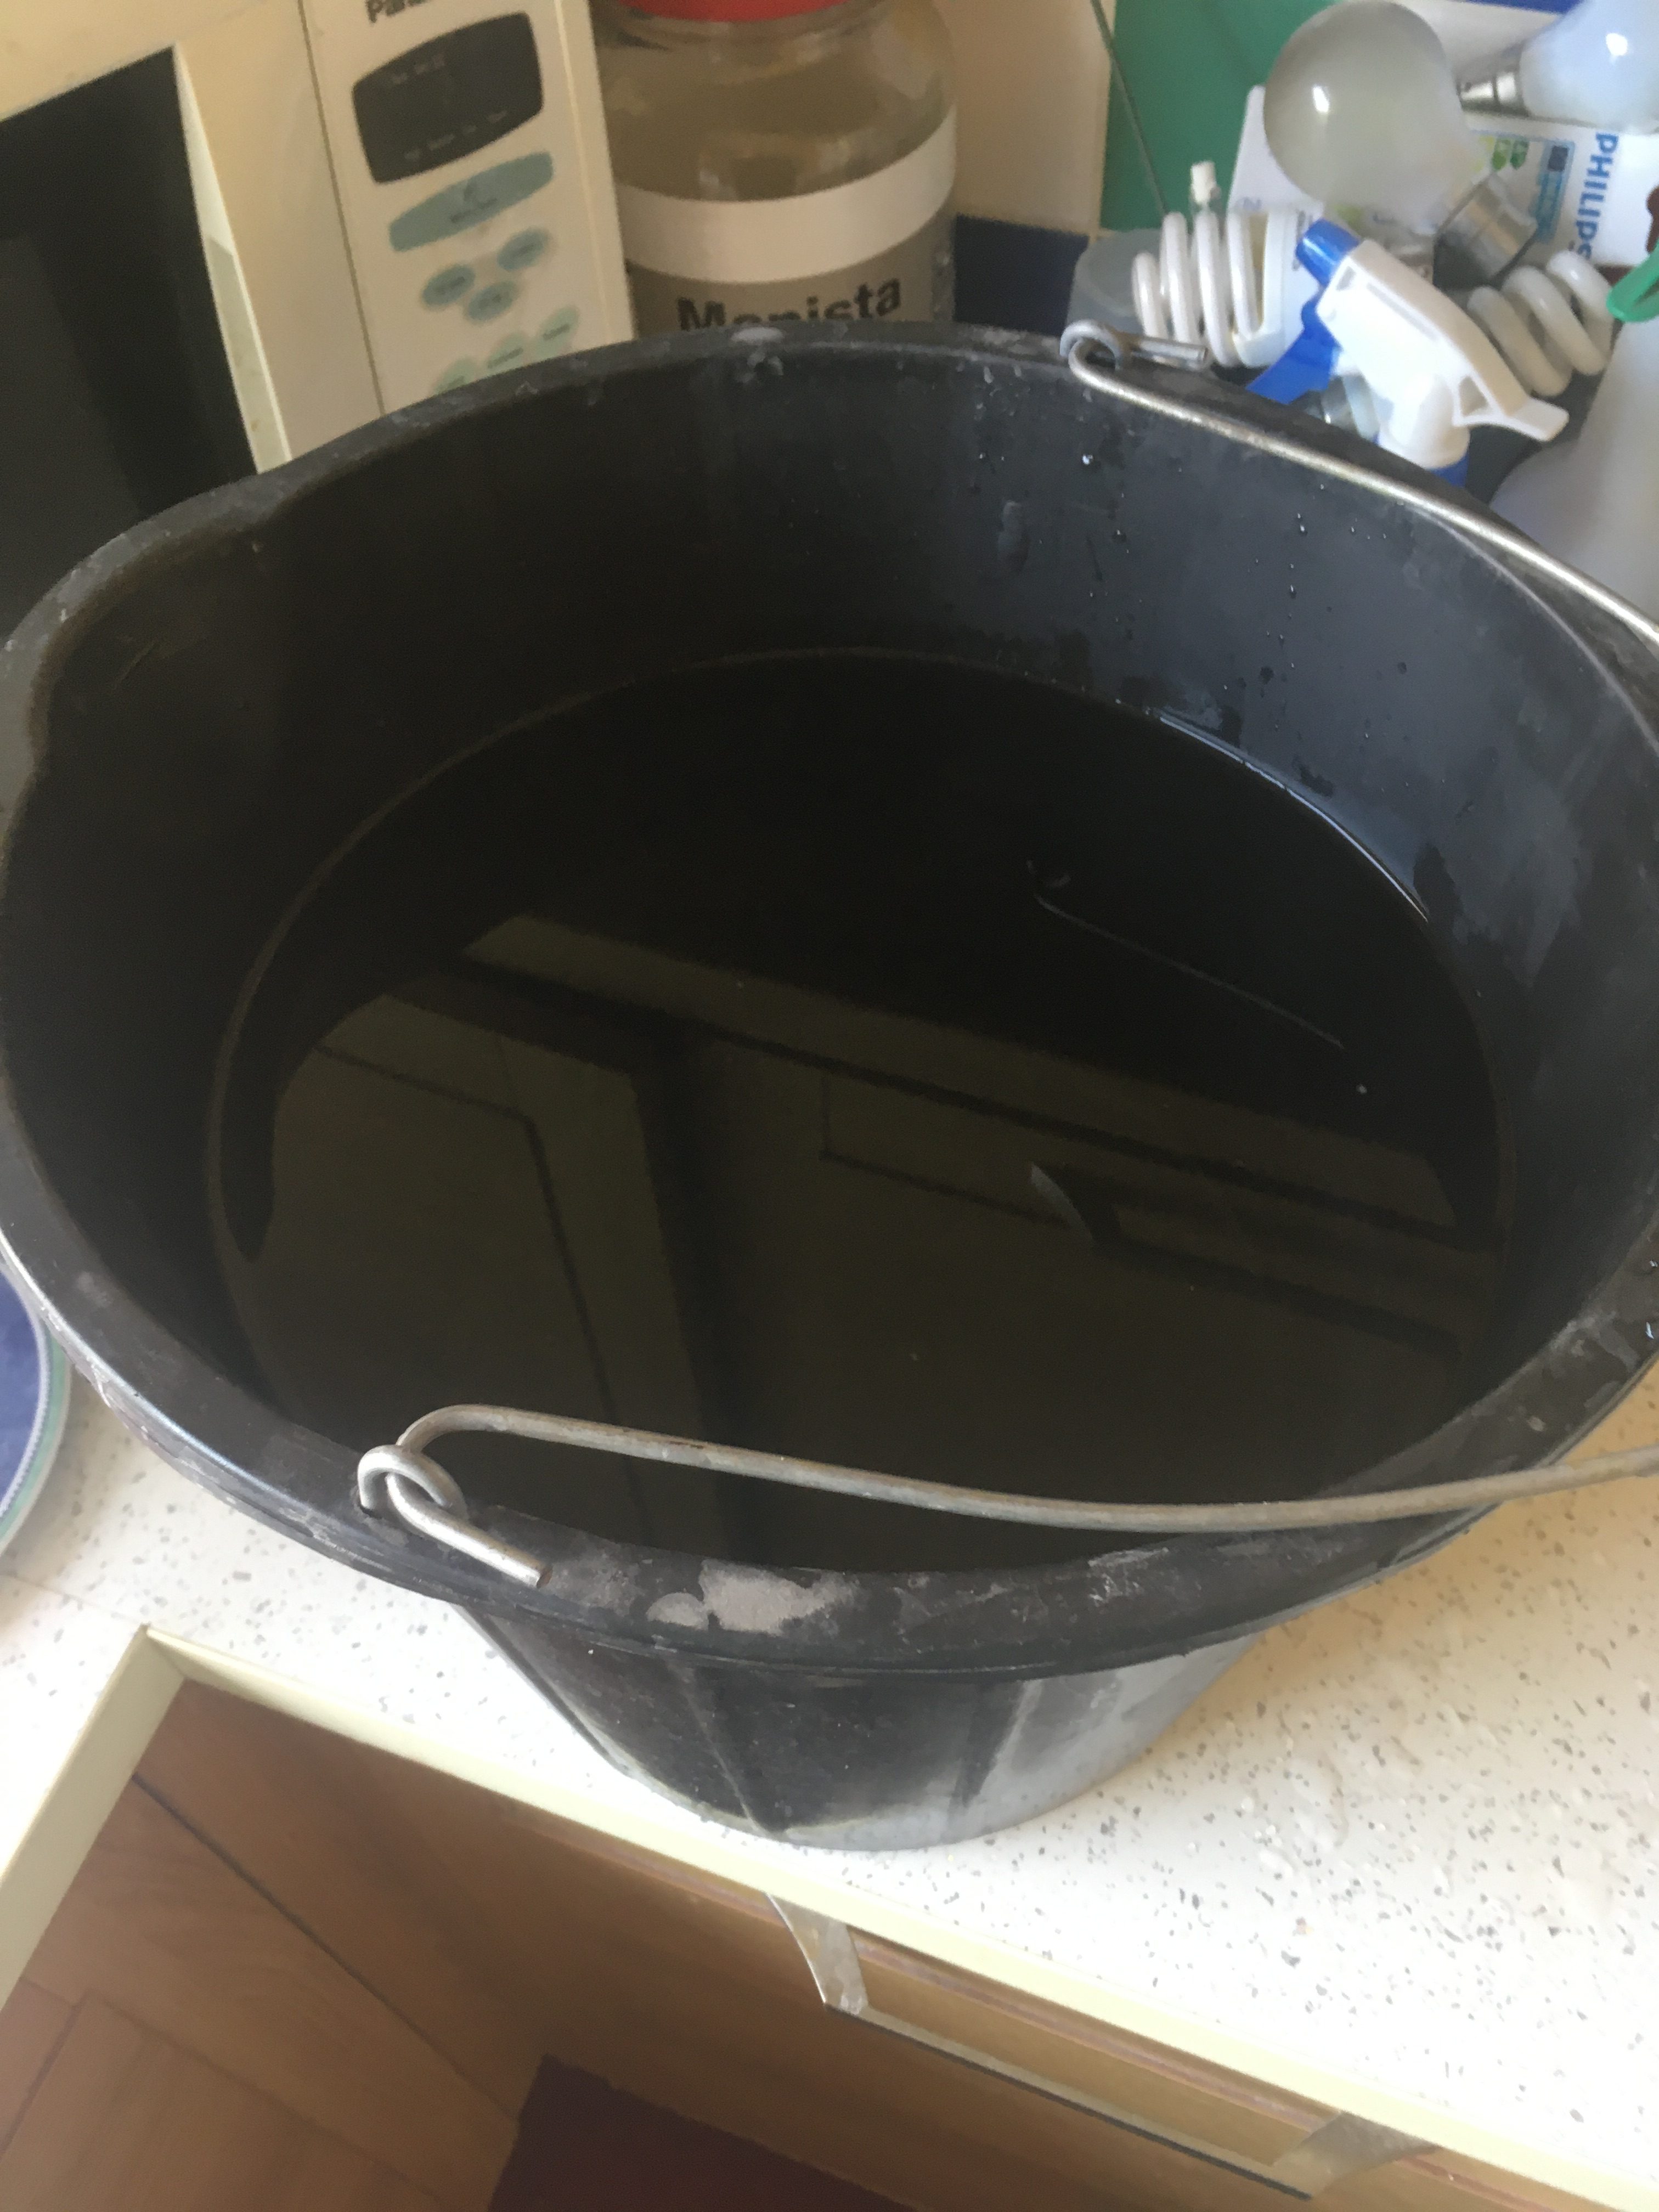
Not much appeared to happen for the first few hours, so I walked away and left it for 48 hours in total.
I was expecting large holes to open up as the rust dissolved, but this didn’t happen.
In a way it would have been better if it had.
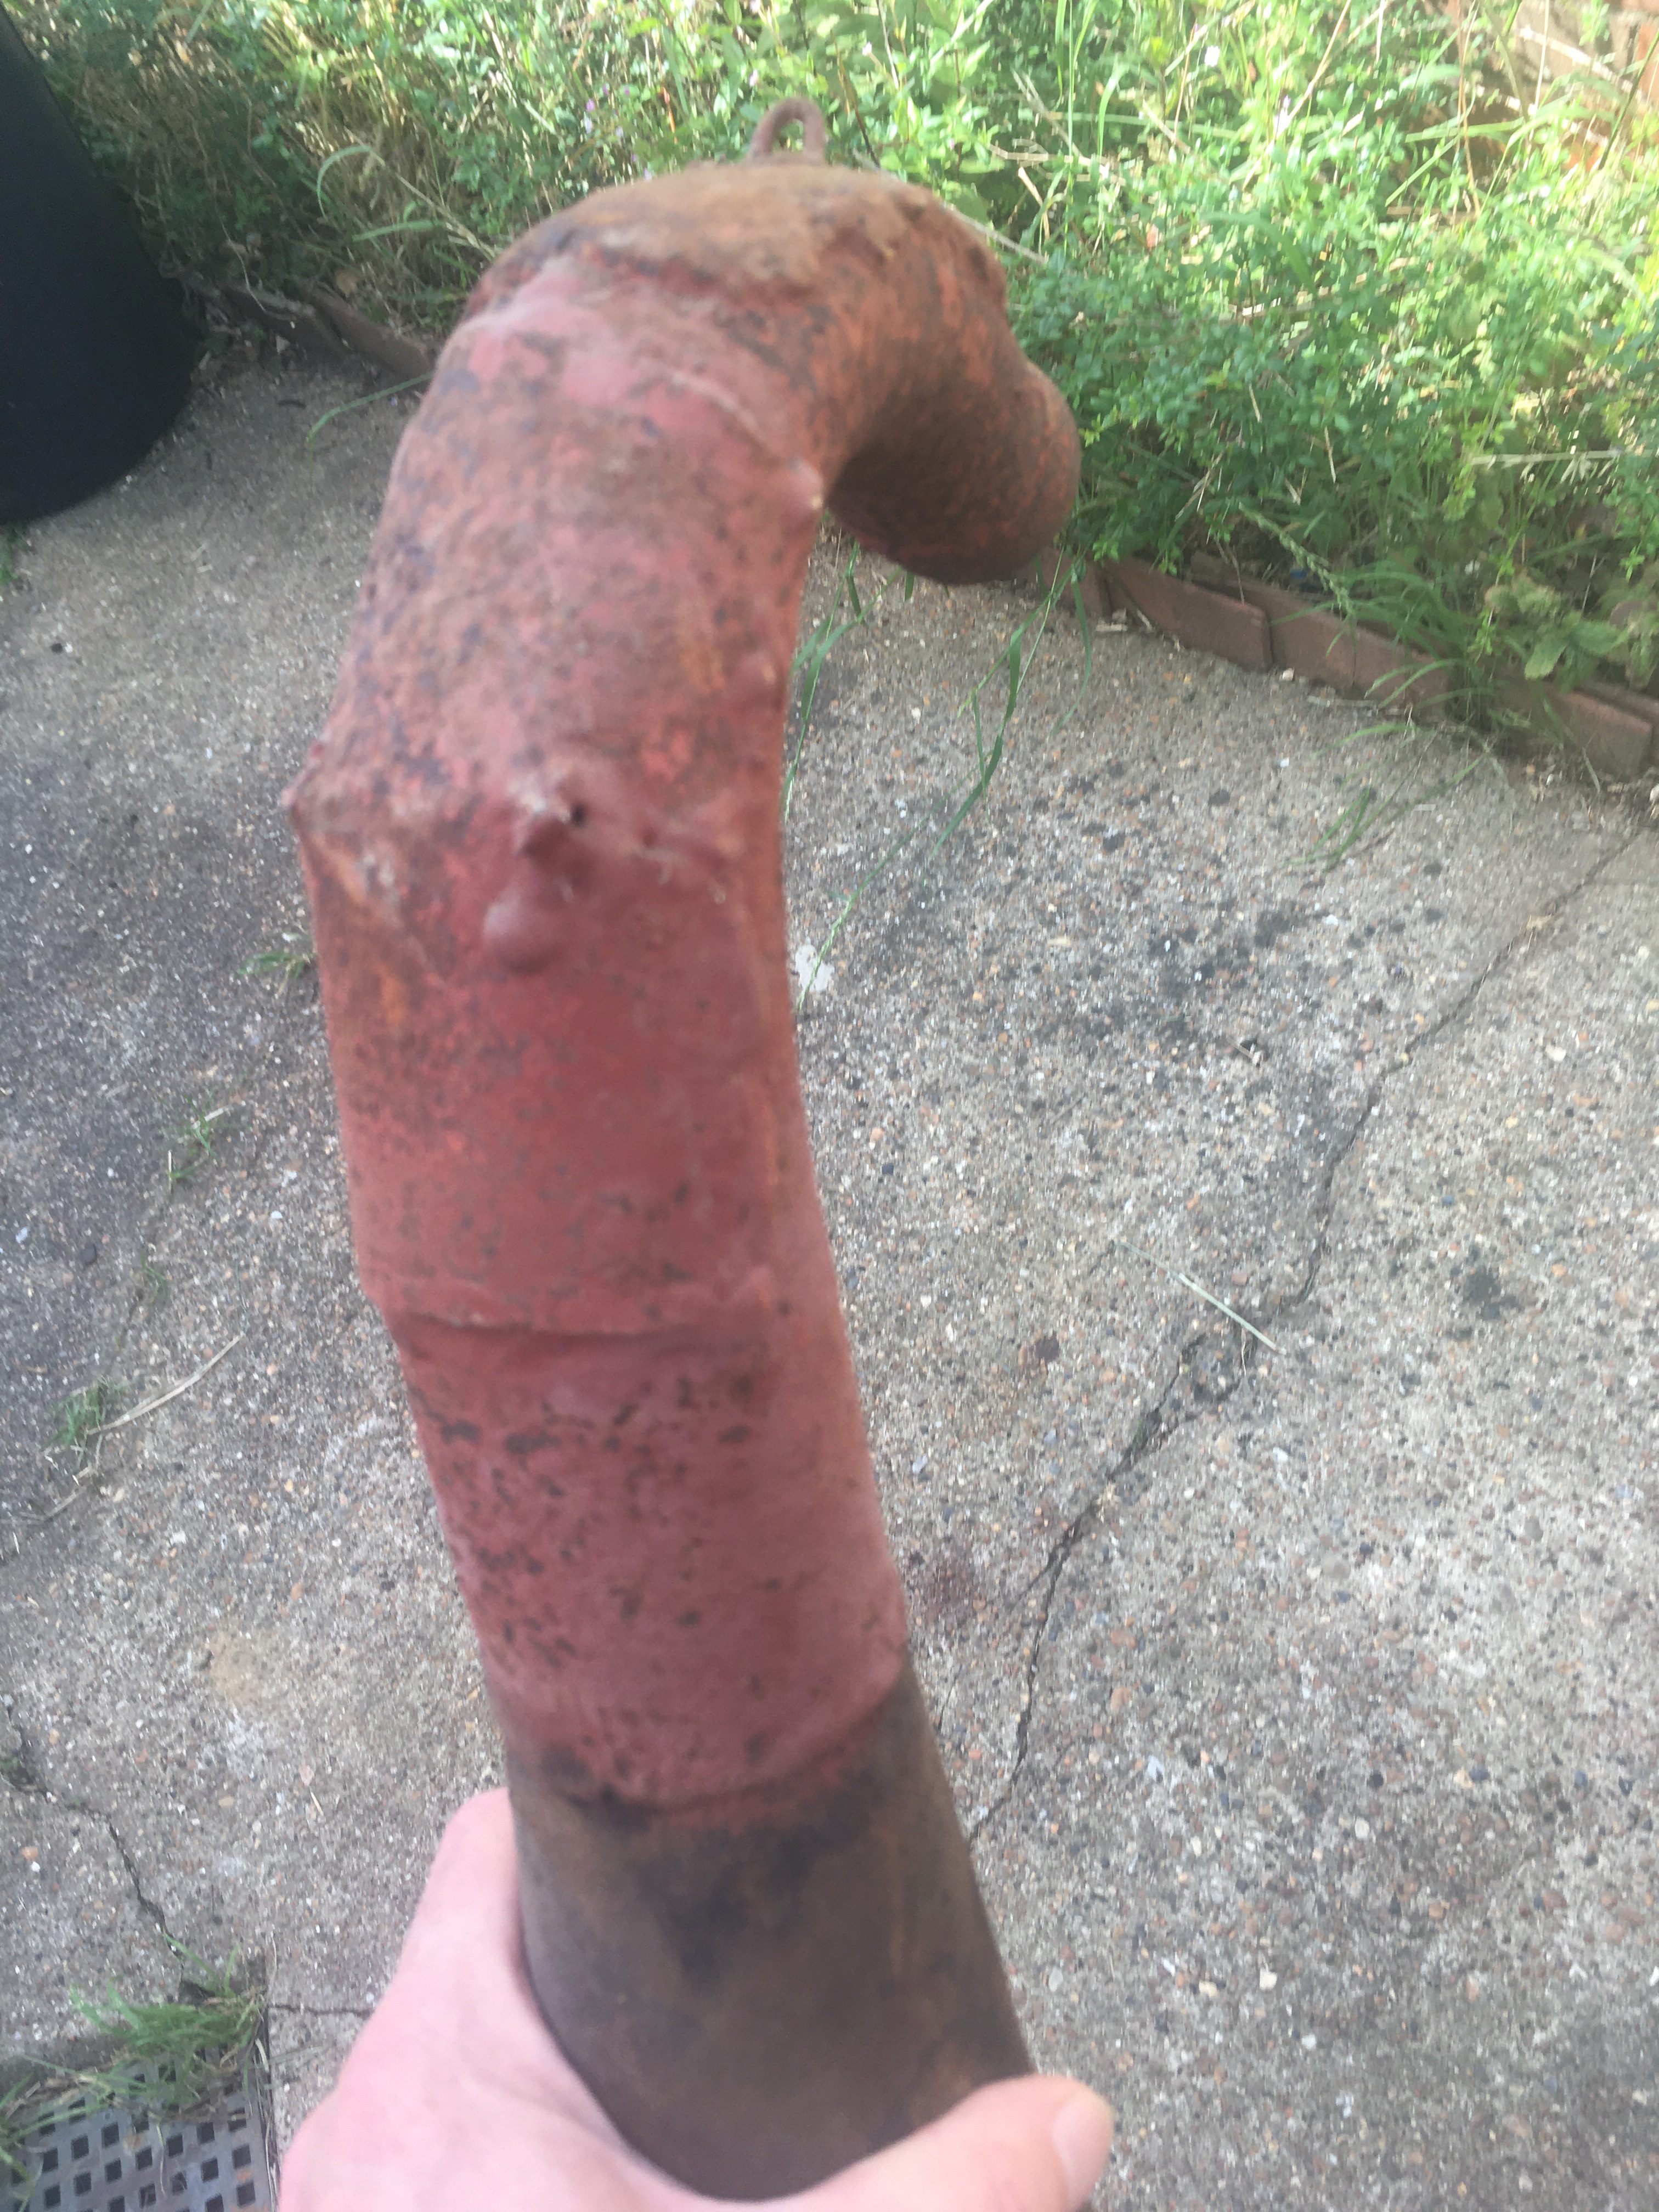
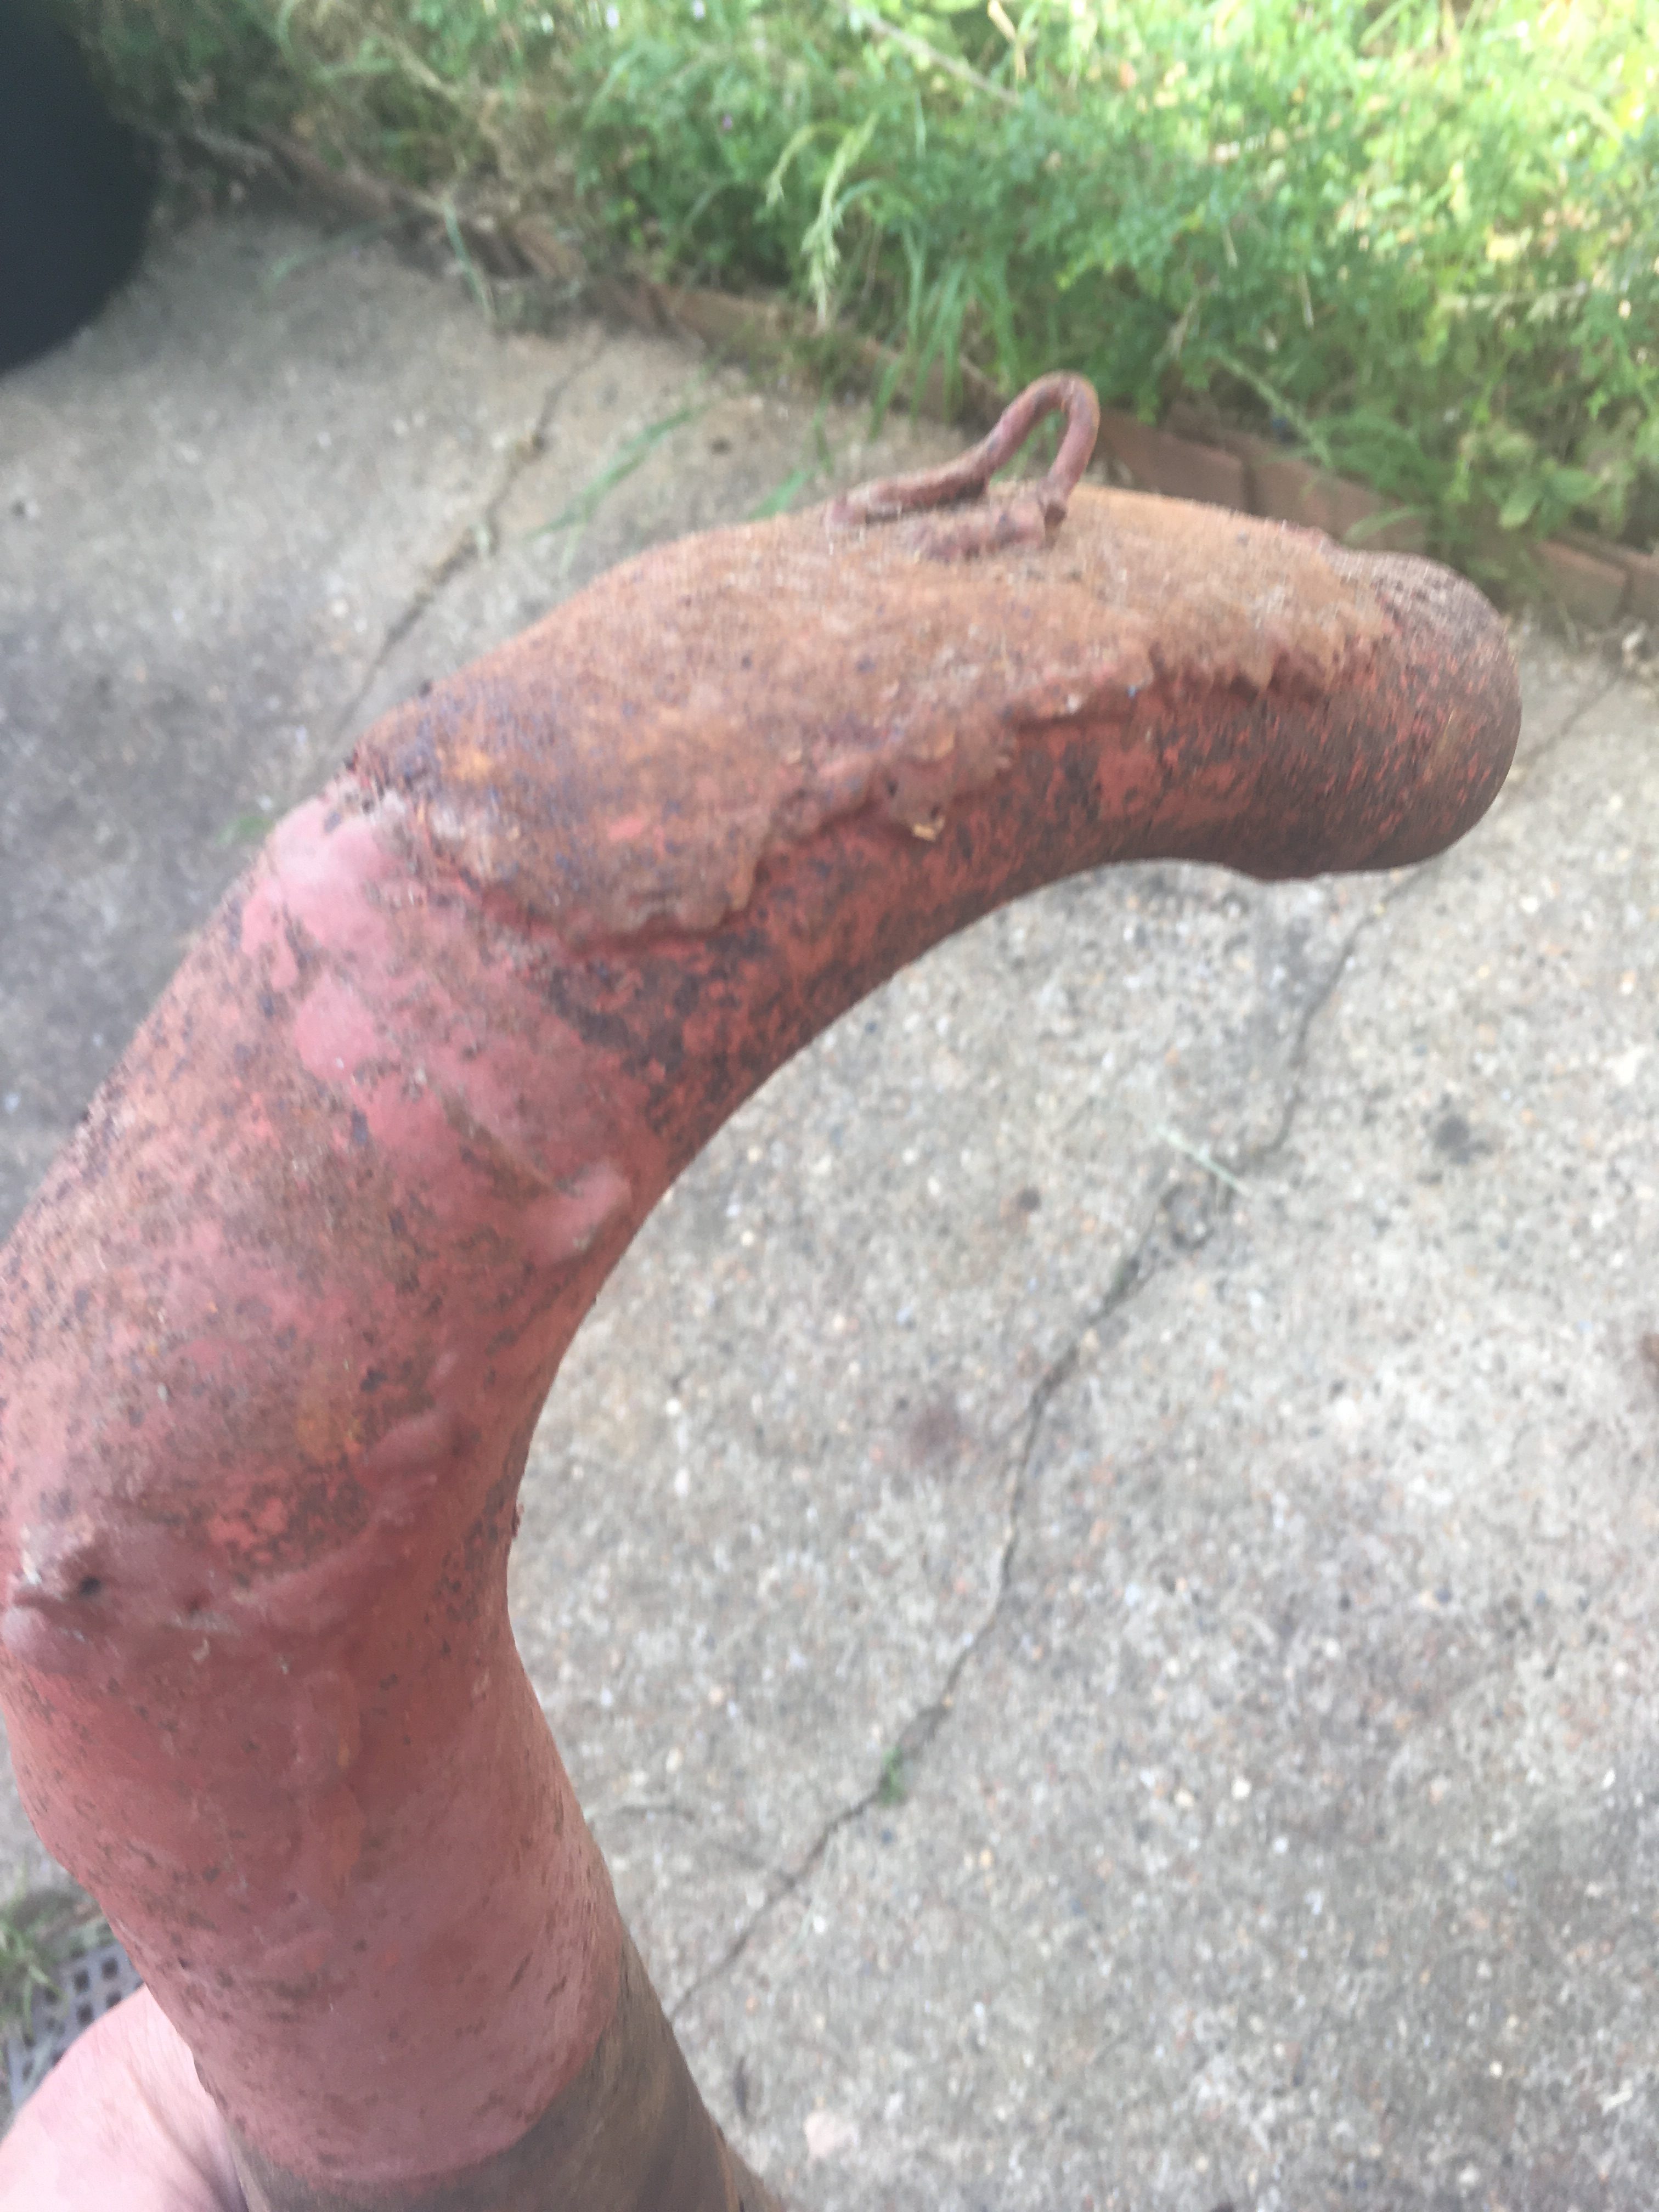
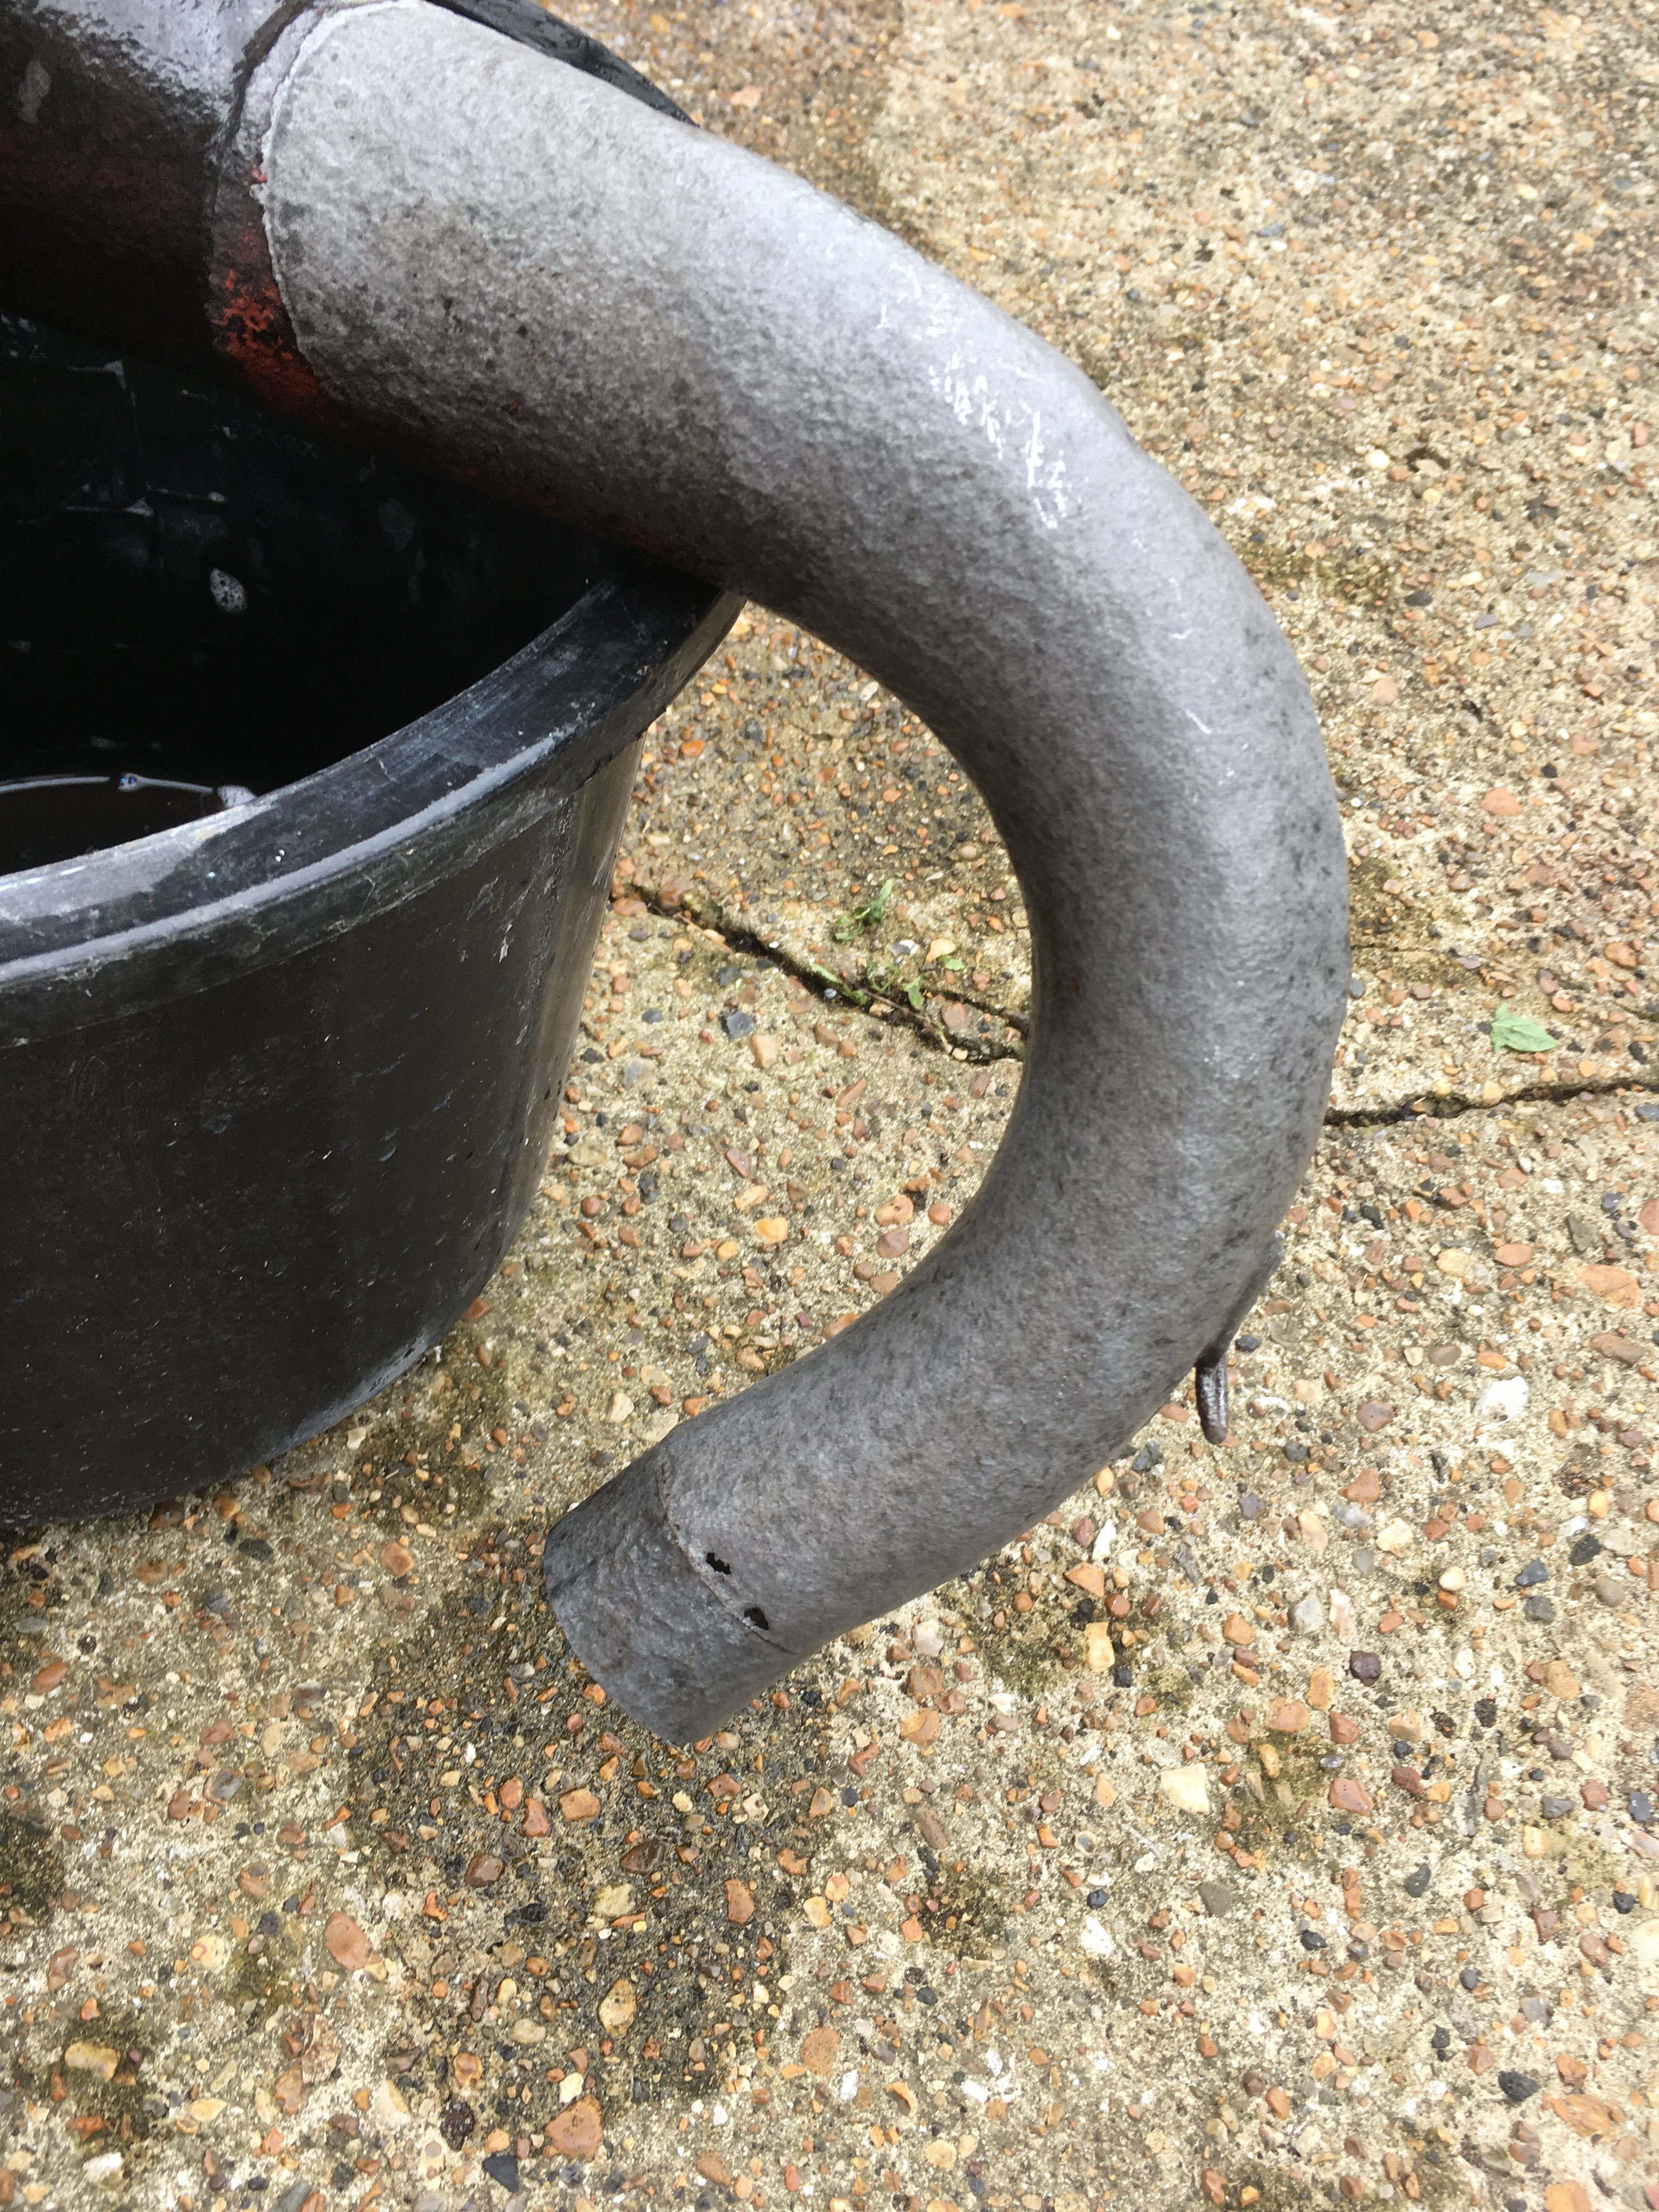
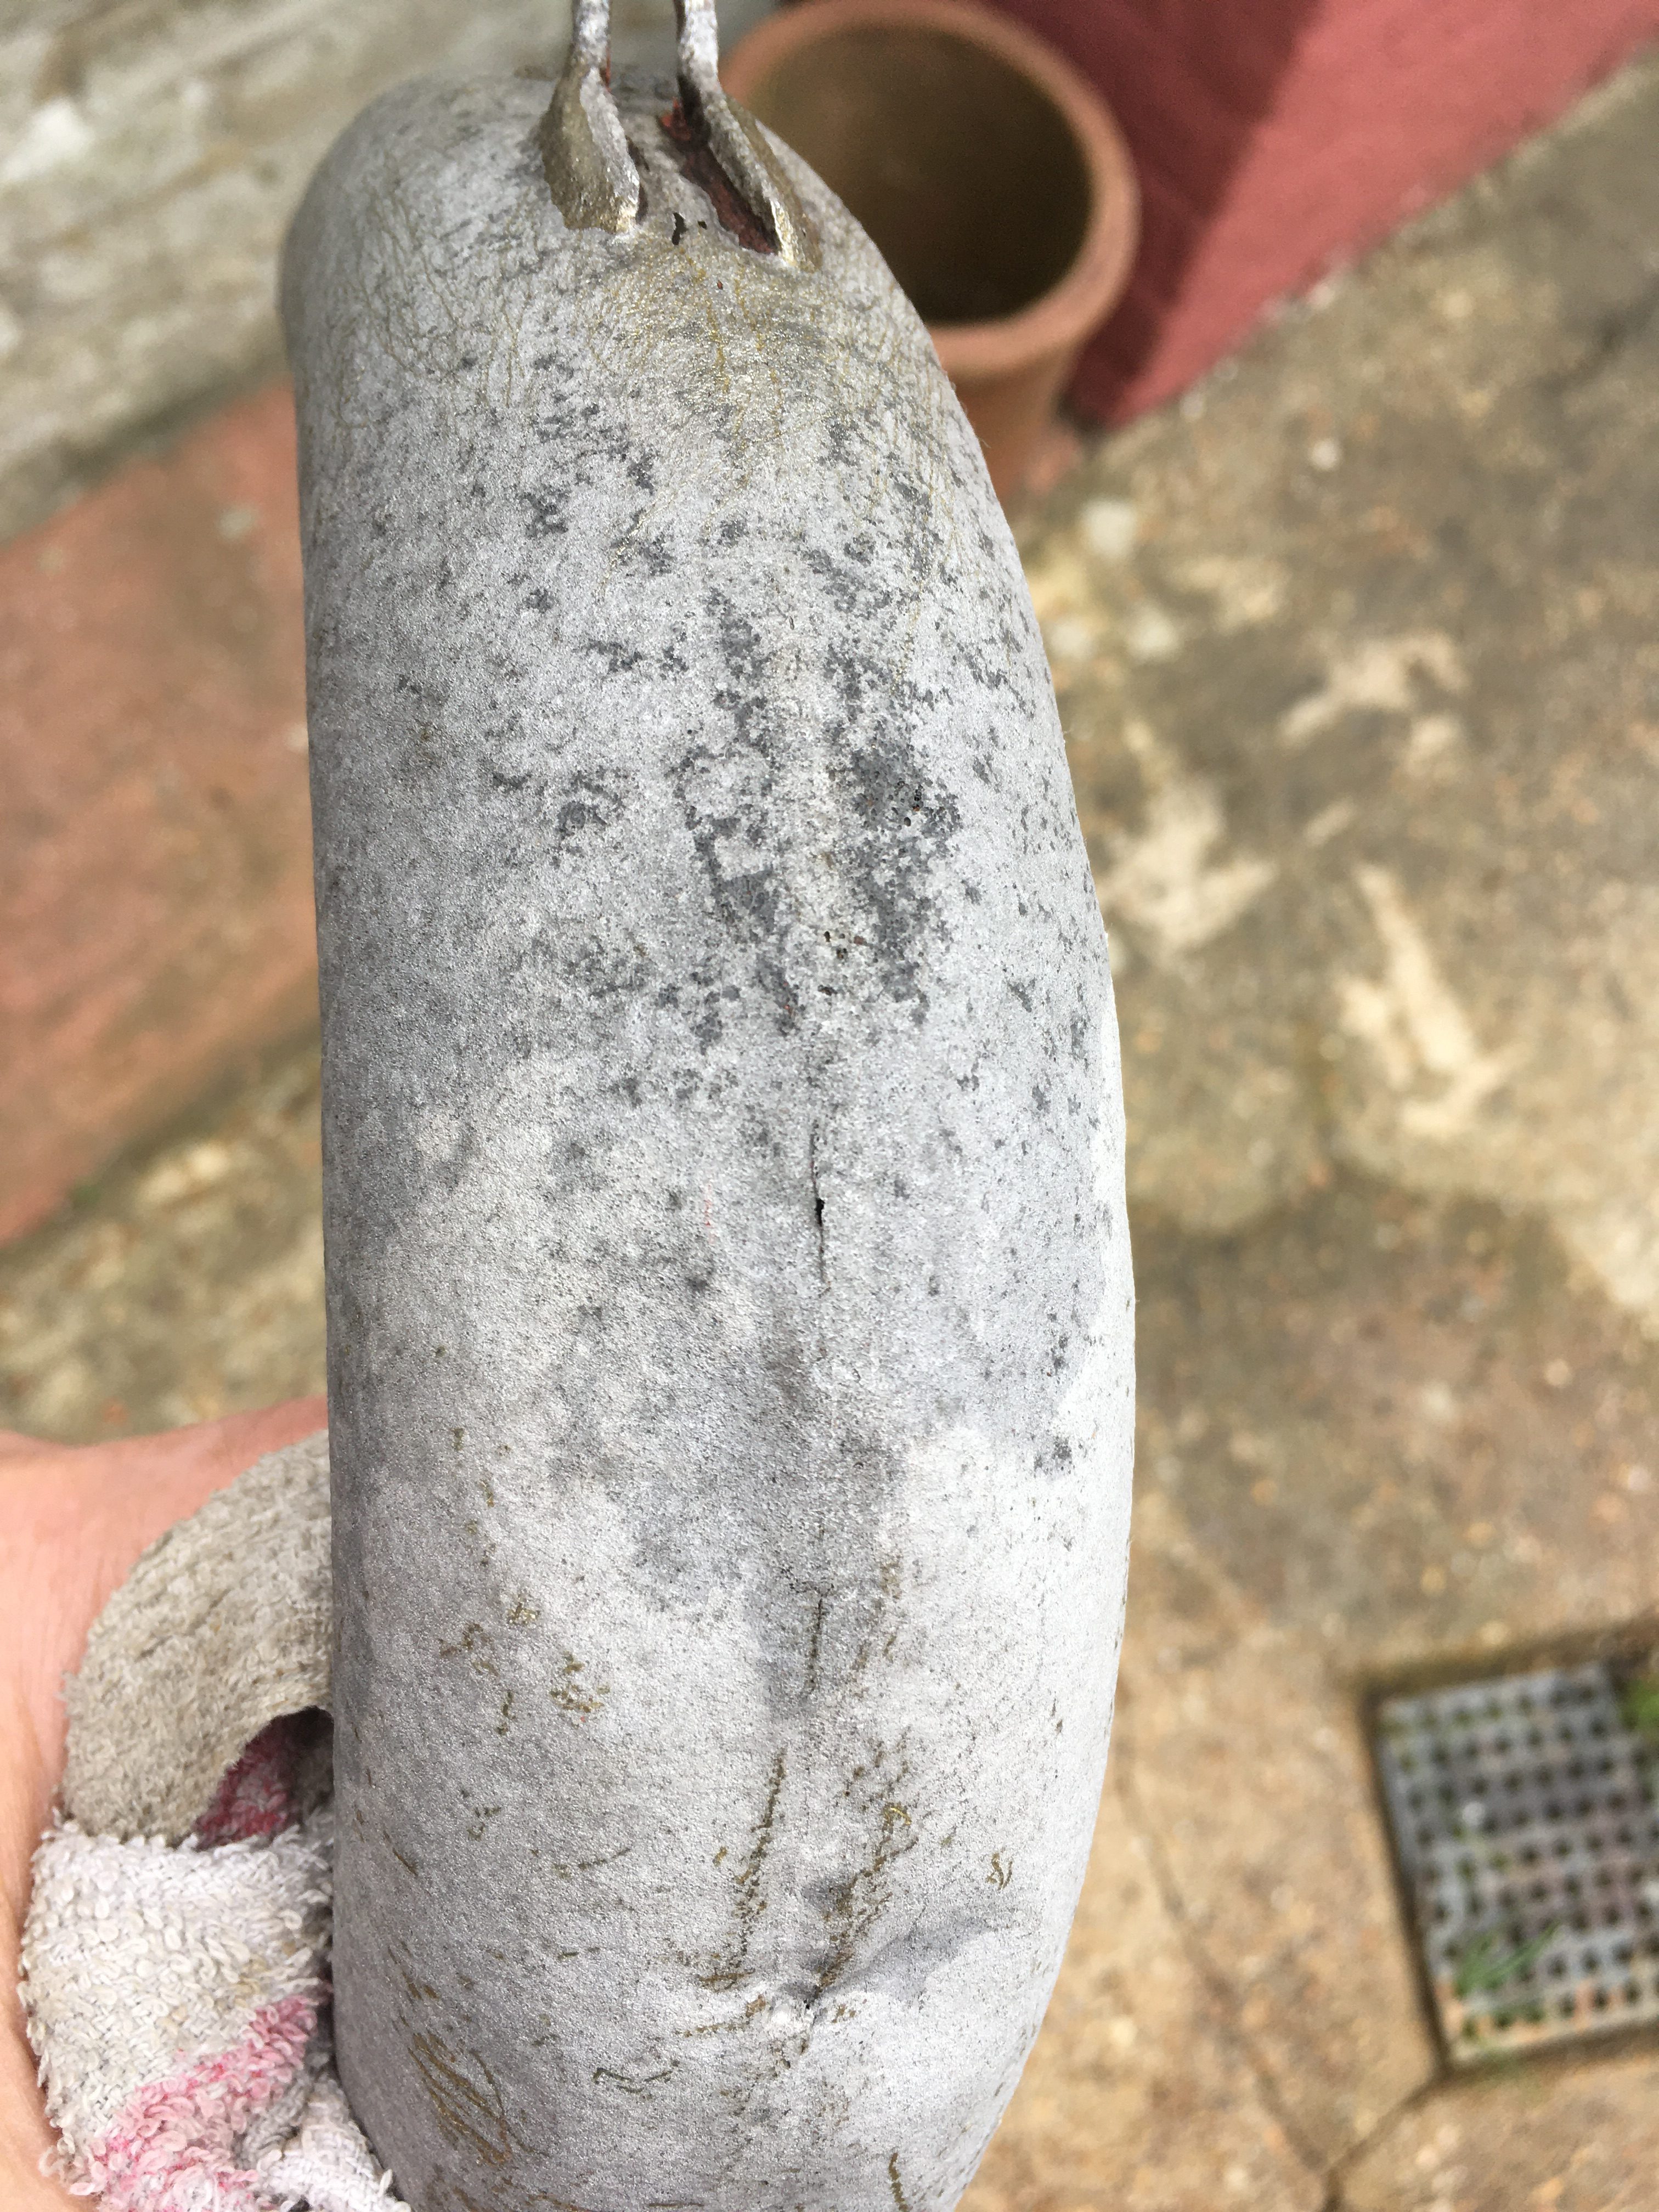
The rust is miraculously gone, (the paint too!)
I removed the pipe, rinsed it down with lots of water, and scrubbed with a stiff nylon brush.
Now we can see the problems.
The one small hole has become two, and the metal around this area bends to slight fingernail pressure. There are splits and a further hole on the forward facing part of the tube.
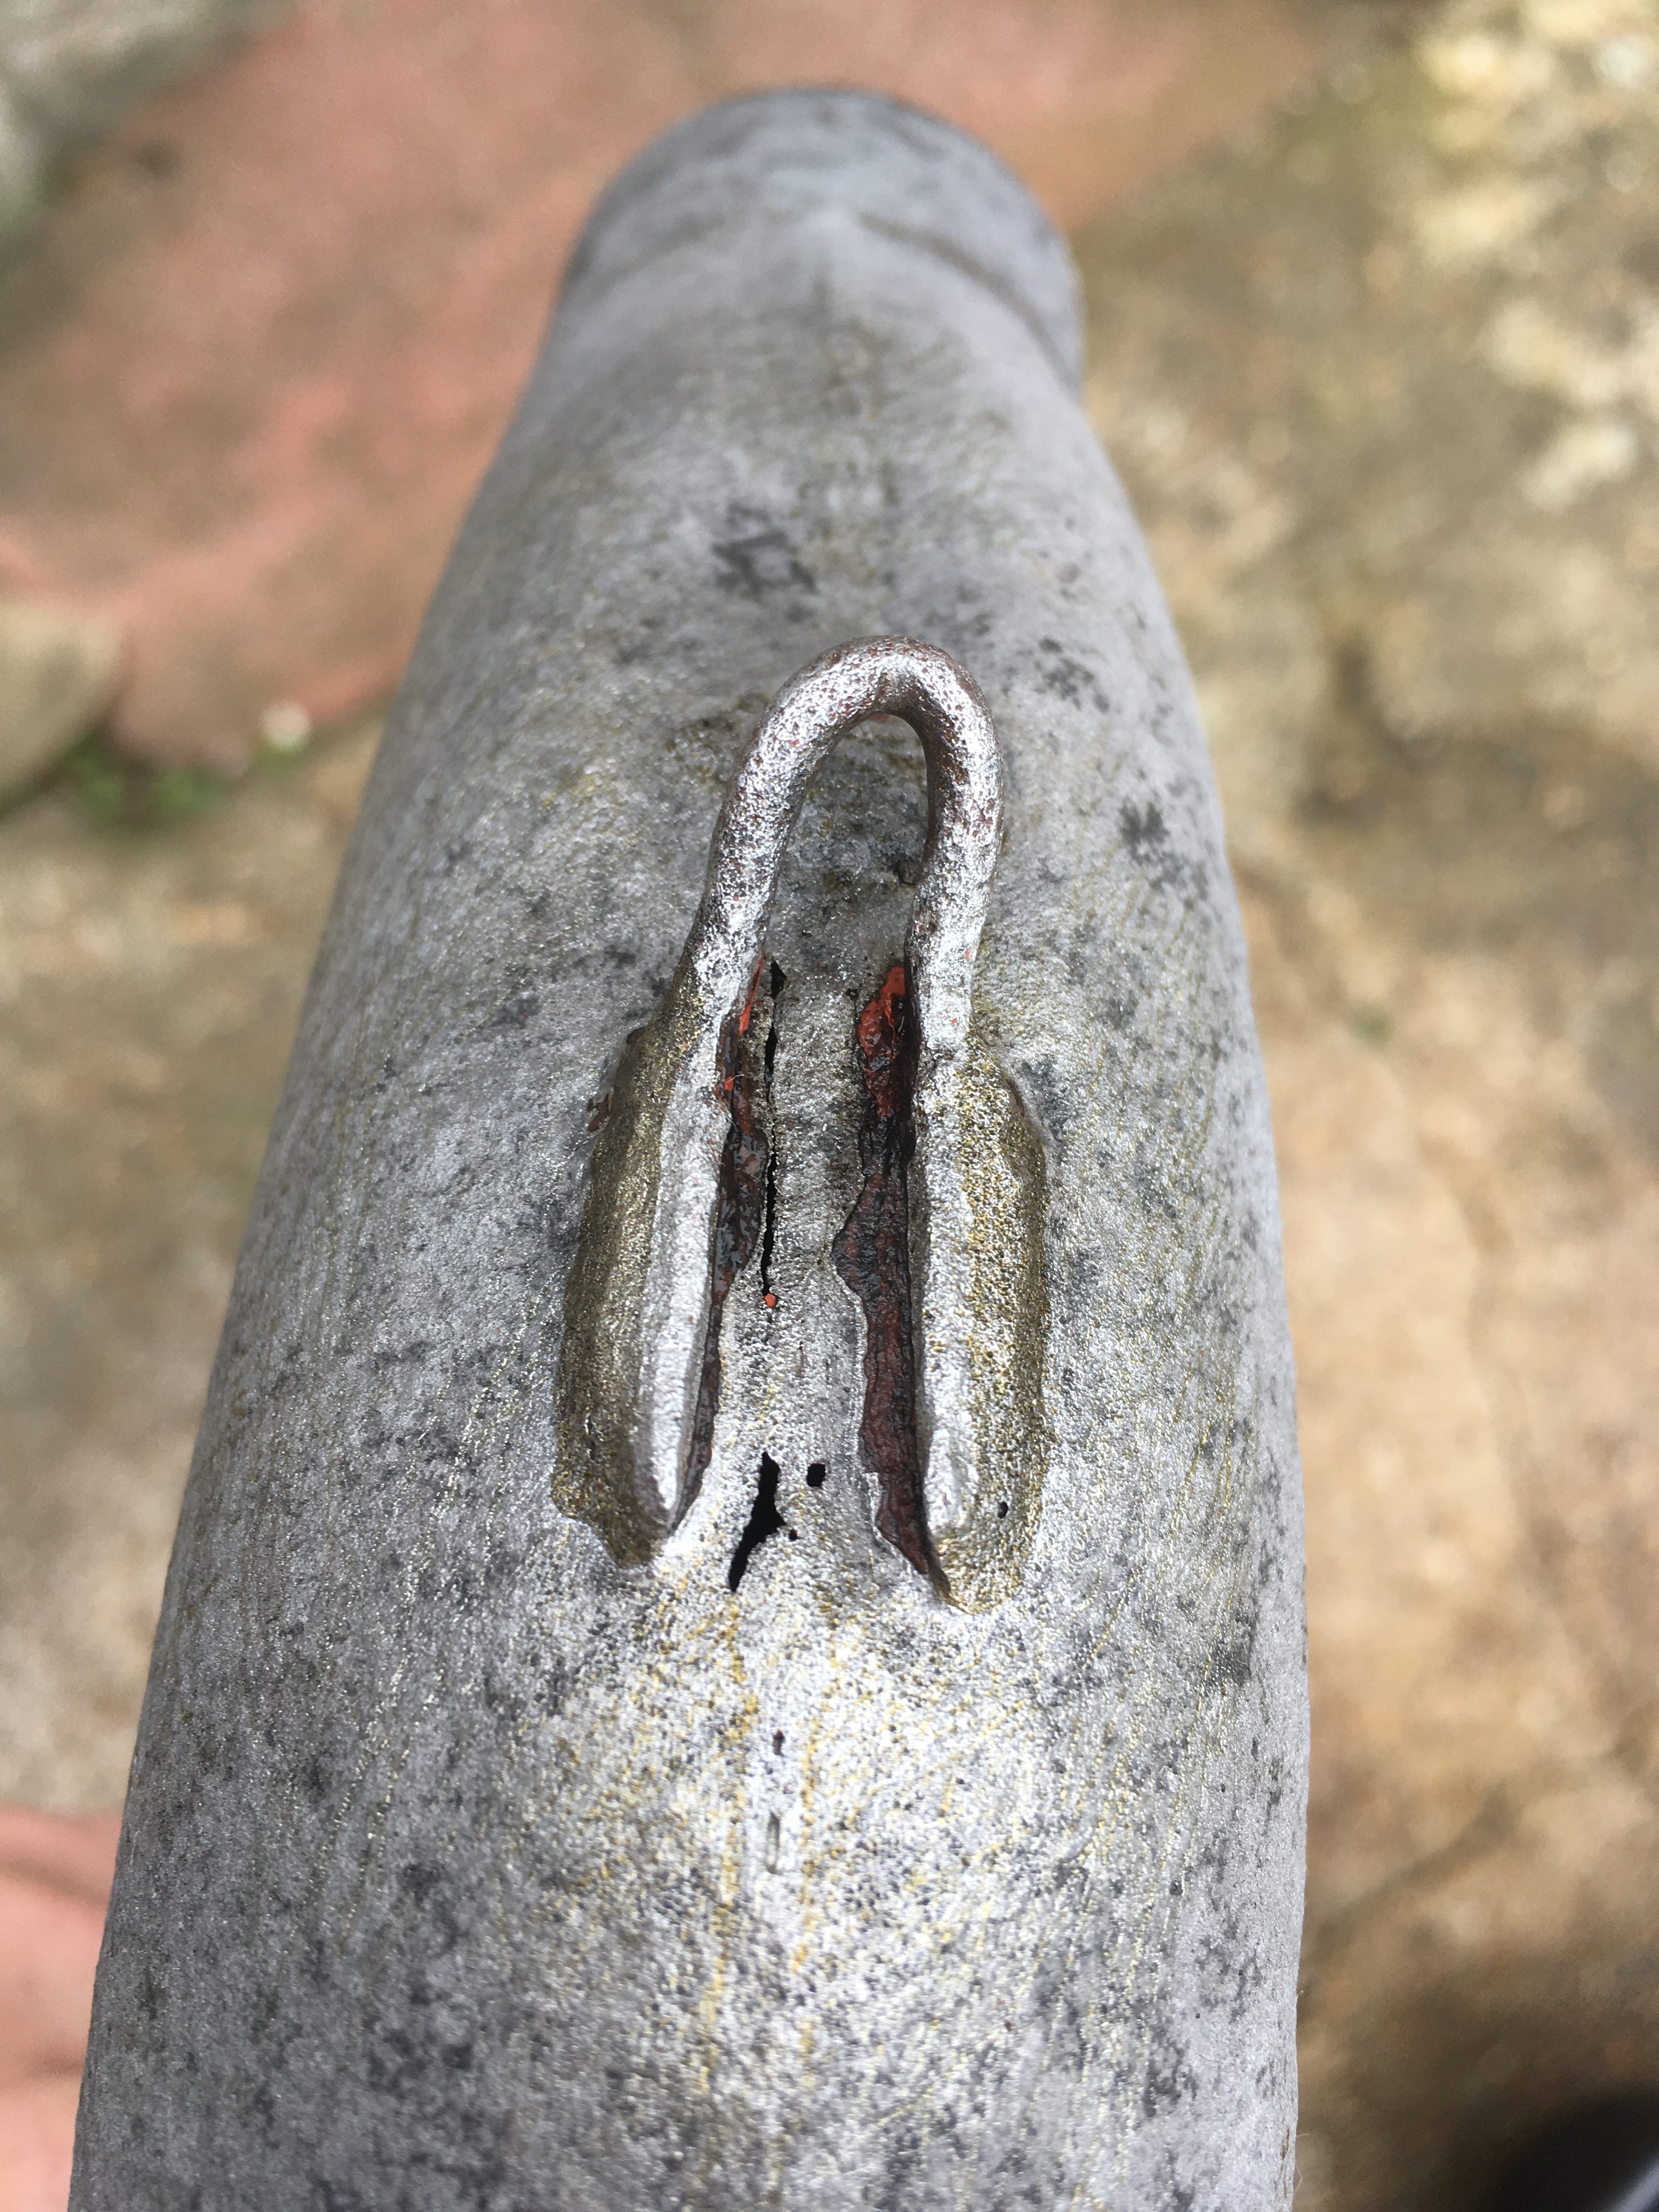
I don’t think there is sufficient thickness of metal to weld a repair, so the damaged sections need to be removed and replaced somehow.
Update Spetember 9th
Well, Nobody I have contacted to see if the downtubes can be replaced, has bothered to respond.
With nothing to lose, and the MIG working again, (to repair holes in the 31K pipes currently on the bike), I had a go!
As I suspected the metal is paper thin. I managed to get one (of many required) patches welded on, but with the second I attempted, there simply isn’t any good metal to which to weld.
Even on the lowest settings I could manage on the MIG, as soon as I started, it melted a big hole in the surrounding area.
Regrettably, I think these pipes are junk.
However, they will remain hanging on the wall for a time while I think this through.